If your Estate oven door won’t close properly or you don’t know how to remove it, this article. Today, we will look at Estate oven door problems and show you how to fix them.
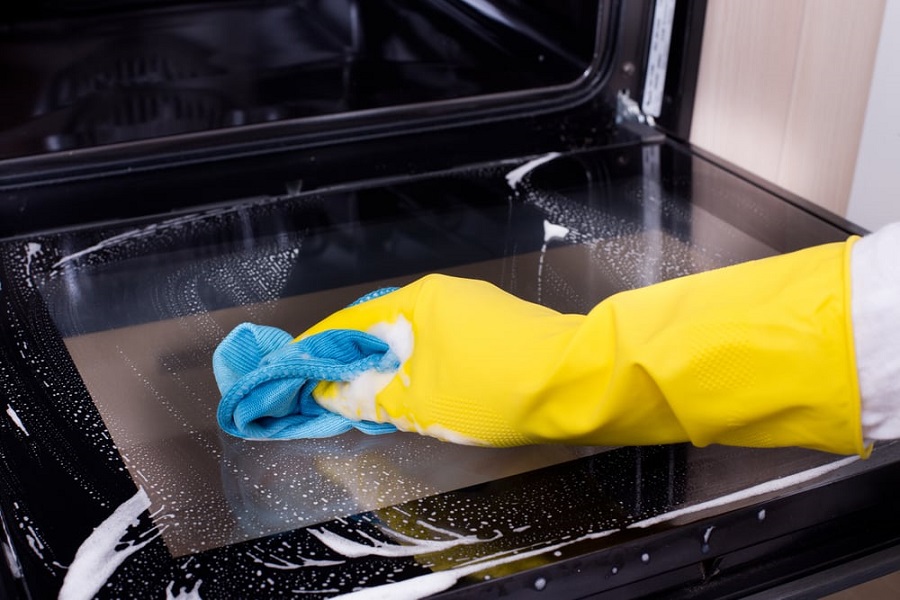
Table of Contents
How To Uninstall Estate Oven Door
Below, we have listed the steps you need to follow in order to remove your Estate oven door…
Step 1: First, disconnect the power to your Estate by unplugging the power cord from the outlet. You will need to pull the oven away from the wall to access the power cord.
Step 2: Next, get a flat blade screwdriver.
Step 3: Open the door of your Estate oven.
Step 4: Now, use the flat blade screwdriver to flip the hinge latches forward. There is one locking latch on each door hinge.
Step 5: Once you have flipped the latches, push the door closed till it stops moving.
Step 6: Grip the sides of the oven door.
Step 7: Lift the door up, tilt the hinges in, and remove it from the oven.
If the steps above for uninstalling an Estate oven door don’t work on your oven model, follow the steps listed below…
Step 1: First, make sure you have disconnected the power to the oven. If you haven’t, pull the oven away from the wall and unplug the power cord from the outlet.
Step 2: Open the oven door slightly. The door should be at the broiling position.
Step 3: Grip the sides of the door.
Step 4: Carefully lift the left door hinge out of the slot.
Step 5: Lift the other hinge from the slot as well.
Step 6: Pull the door off the oven.
How To Put Estate Oven Door Back On
Below, we have listed the steps you need to follow in order to reinstall your Estate oven door…
Step 1: Lift the door of your Estate oven.
Step 2: Position each door hinge into the slots in the lower corners of the oven’s frame.
Step 3: Once the hinges are properly positioned in the slots, open the door fully.
Step 4: To hold the door in place, flip back the latches on the hinges.
Step 5: Shut the door of the oven.
Step 6: If you disconnected the power to the oven, reconnect it.
If the steps above for reinstalling an Estate oven door don’t work on your oven model, follow the steps listed below…
Step 1: Grip the sides of the oven door and lift it up.
Step 2: With the door in a straight position, insert each door hinge into the slots in the lower corners of the oven’s frame. The hinges won’t go in completely.
Step 3: Once the hinges are in the slots, open the door slightly to the broiling position.
Step 4: Lift the door a bit and push the hinges into the slots properly.
Step 5: Open the door of the oven completely.
Step 6: Shut the door.
Step 7: If you disconnected the power to your Estate oven, reconnect it.
Estate Oven Door Is Not Closing Properly — How To Fix
Below, we talk about the possible reasons why your Estate oven door is not closing properly and show you what to do about them.
1. Door Gasket Or Door Seal
If your Estate oven door won’t close all the way, the door gasket may be the cause of the issue. When the gasket starts wearing out, the door will stay partially open. Below, we have listed the steps you need to follow in order to replace your Estate oven door seal…
Step 1: First, disconnect the power to your Estate oven. To do this, you will need to pull the oven away from the wall. Once you have pulled the oven away from the wall, unplug the power cord from the outlet.
Step 2: Open the door of your Estate oven.
Step 3: The seal is around the oven’s frame. There are clips around the seal which are inserted into the holes on the frame. To release the seal, pull out these clips from the holes.
Step 4: Discard the door seal.
Step 5: Get a new Estate oven door seal.
Step 6: Insert the clips on the new door seal into the holes around the oven’s frame.
Step 7: Shut the door of the oven.
Step 8: Plug the power cord back into the outlet and return the oven to its usual position.
Watch the video below for a visual of how to replace your Estate oven door seal.
If the steps above don’t work for you, follow the steps listed below to replace your Estate oven door gasket…
Step 1: As always, make sure to disconnect the oven’s power before starting the repair. To do this, pull the oven away from the wall. Once you have pulled the oven away from the wall, unplug the cord from the outlet to disconnect the power.
Step 2: Open the door of your Estate oven.
Step 3: The gasket is around the oven door. Pull out the ends of the gasket from the holes at the bottom of the oven door.
Step 4: Now, pull out the gasket’s clips from the smaller holes around the door. If the clips are difficult to pull out, use a pair of needle nose pliers.
Step 5: Get a new Estate oven door gasket.
Step 6: Insert the gasket’s clips into the holes around the door.
Step 7: Get a flat blade screwdriver.
Step 8: Use the flat blade screwdriver to push the ends of the gasket into the holes in the bottom of the door.
Step 9: Shut the door of the oven.
Step 10: Plug the power cord back into the outlet and return the oven to its usual position.
Watch the video below for a visual of how to replace your Estate oven door gasket.
2. Door Hinges
If your Estate oven door still won’t close properly after replacing the gasket, the door hinges are most likely faulty. Below, we have listed the steps you need to follow in order to replace your Estate oven door hinges…
Step 1: First, make sure to disconnect the power to your Estate oven by unplugging the cord from the outlet. You will need to pull the oven away from the wall to do this.
Step 2: Open the door of the oven.
Step 3: Get a flat blade screwdriver.
Step 4: Use the flat blade screwdriver to flip the latch on each door hinge forward. This will release the oven door.
Step 5: Close the door till it can’t go any further.
Step 6: Grip the sides of the oven door, tilt it in, and lift it off.
Step 7: Set the door assembly on a sturdy surface lined with a cloth.
Step 8: Get a Philips head screwdriver.
Step 9: Use the Philips head screwdriver to take out the two screws at the top of the oven door which hold the cap in place.
Step 10: Pull the trim off the door.
Step 11: Carefully slide the inner glass off the door assembly and set it aside on a cloth lined surface.
Step 12: Using a quarter inch nut driver or socket, take out the screws which hold the door handle in place.
Step 13: Remove the handle from the door.
Step 14: Use the Philips head screwdriver, to take out all the screws on the bottom of the door which hold the trim and hinges in place.
Step 15: Lift the trim off the outer glass.
Step 16: Take out the screws on the sides of the trim which hold the hinges in place.
Step 17: Lift the trim up and remove the hinges.
Step 18: Get new Estate oven door hinges.
Step 19: Position the new hinges on the door trim and hold them in place with the screws.
Step 20: Lift the trim and reposition it on the outer glass.
Step 21: Return the screws at the bottom of the door which hold the trim and hinges to the door.
Step 22: Reposition the handle on the door and hold it in place with the screws.
Step 23: Slide the inner glass onto the door assembly.
Step 24: Position the top trim back on the door.
Step 25: Hold the trim in place using the two screws.
Step 26: Lift the oven door.
Step 27: Insert the hinges into the slots in the sides of the oven.
Step 28: Open the door of the oven.
Step 29: Flip the hinge latches back to hold the door in place.
Step 30: Shut the door of the oven.
Step 31: Plug the power cord back into the outlet and return the oven to its usual position.
Watch the video below for a visual of how to replace your Estate oven door hinges.
If the steps above for replacing Estate oven door hinges don’t work on your oven model, follow the steps listed below…
Step 1: First, make sure to disconnect the power to your oven by unplugging the cord from the outlet. To access the power cord, you will need to pull the oven away from the wall.
Step 2: Open the oven door slightly to the broiling position.
Step 3: Grip the sides of the door.
Step 4: Lift the door a bit and pull the hinges out of the slots.
Step 5: Set the door assembly on a sturdy surface lined with a cloth.
Step 6: Get a Philips head screwdriver.
Step 7: Use the Philips screwdriver to take out the four screws at the bottom of the door.
Step 8: Slide the outer glass off the door assembly.
Step 9: Set the glass aside on a cloth lined surface.
Step 10: Take out off the two side trims on the oven door.
Step 11: Take out the two screws which hold the steam deflector at the bottom of the door.
Step 12: Lift the steam deflector off.
Step 13: Use the Philips head screwdriver to unscrew the door handle and top cap. There are two screws.
Step 14: Lift the door handle assembly off.
Step 15: Take out the screws which hold the small metal brackets at the top of each door hinge.
Step 16: Carefully lift the small metal hinge retainers off the top of each door hinge.
Step 17: Take out the two screws at the bottom of the hinges which hold it to the assembly.
Step 18: Lift the hinges off the door.
Step 19: Get new Estate oven door hinges.
Step 20: Peel the leather strips off the old door hinges.
Step 21: Apply some adhesive on the leather strips and stick them to the new door hinges.
Step 22: Position the new hinges on the door and hold them in place with the screws.
Step 23: Return the hinge retainers and metal brackets.
Step 24: Hold the metal brackets in place with the screws.
Step 25: Reposition the top cap assembly on the door and hold them in place with the two screws.
Step 26: Position the side trims on the oven door.
Step 27: Slide the outer glass onto the door assembly.
Step 28: Hold the outer glass in place with the four screws.
Step 29: Lift the oven door.
Step 30: With the door straight up, insert each hinge into the slot. The hinges won’t go in completely at this point.
Step 31: Open the door a bit to the broiling position.
Step 32: Lift the door and push the hinges into the slots properly.
Step 33: Open the door fully, then shut it.
Step 34: Plug the cord back into the outlet and return the oven to its usual position.
Watch the video below for a visual of how to replace Estate oven door hinges.
Estate Oven Door Glass Shattered — What To Do
If your Estate oven door glass is shattered, you will need to replace it. Below, we show you how to replace the outer and inner glass of your Estate oven door.
1. Outer Glass
Below, we have listed the steps you need to follow in order to replace the outer glass of your Estate oven door…
Step 1: Disconnect the oven’s power by unplugging the power cord from the outlet. You will need to pull the oven away from the wall to do this.
Step 2: Open the oven door slightly.
Step 3: Get a Philips head screwdriver.
Step 4: Using the screwdriver, take out the two screws at the top of the oven door which hold the handle assembly.
Step 5: Lift the door handle assembly off. Once you lift the the assembly off, the outer glass will fall off. Make sure to secure the glass to prevent this from happening.
Step 6: Remove the remains of the outer glass.
Step 7: Get a new outer glass for your Estate oven door.
Step 8: Position the glass on the door.
Step 9: Hold the glass in place and position the top cap on the door.
Step 10: Hold the cap in place with the two screws.
Step 11: Shut the oven door.
Step 12: Plug the cord back into the outlet and return the oven to its usual position.
Watch the video below for a visual of how to replace the outer glass of your Estate oven door.
If the steps above don’t work for you, follow these steps to replace the outer glass of your Estate oven door…
Step 1: First, disconnect the power to your Estate oven by unplugging the power cord from the outlet. To access the cord, you will need to pull the oven away from the wall.
Step 2: Open the door of the oven.
Step 3: Flip the latch on each door hinge forward.
Step 4: Close the door till it stops moving.
Step 5: Grip the sides of the door and lift it off the oven.
Step 6: Set the door assembly on a sturdy surface lined with a cloth.
Step 7: Use a Philips head screwdriver to take out the two screws which hold the oven’s top cap in place.
Step 8: Pull the cap off.
Step 9: Carefully slide the inner glass off and place it on a cloth lined surface.
Step 10: Next, use a quarter inch nut driver or socket to unscrew the door handle. There are two screws holding the handle in place.
Step 11: Remove the handle.
Step 12: Take out the screws at the bottom of the door which hold the rail assembly to the outer glass.
Step 13: Lift the rail assembly off.
Step 14: Get a new outer glass for your Estate oven door.
Step 15: Position the rail assembly on the outer glass and hold it in place with the screws.
Step 16: Reposition the handle on the oven door.
Step 17: Hold the handle in place with the two screws.
Step 18: Slide the inner glass onto the door assembly.
Step 19: Return the top cap and hold it in place with the two screws.
Step 20: Lift the door.
Step 21: Insert the hinges into the slots in the sides of the oven’s frame.
Step 22: Open the door fully and flip back the hinge latches.
Step 23: Shut the door.
Step 24: Plug the cord back into the outlet and push the oven back to the wall.
Watch the video below for a visual of how to replace the outer glass of an Estate oven door.
2. Inner Glass
Below, we have listed the steps you need to follow in order to replace the inner glass of your Estate oven door…
Step 1: First, disconnect the power to your Estate oven by unplugging cord from the outlet. You will need to go to pull the oven away from the wall to do this.
Step 2: Open the door of the oven. Leave the door at the broiling position.
Step 3: Get a Philips screwdriver.
Step 4: Use the Philips screwdriver to take out the two screws which hold the door’s top cap in place.
Step 5: Pull the cap off the oven door.
Step 6: Remove the remains of the inner glass.
Step 7: Get a new inner glass for your Estate oven door.
Step 8: Position the new glass on the door assembly.
Step 9: Return the top cap and hold it in place with the two screws.
Step 10: Shut the door of the oven.
Step 11: Reconnect the power to the oven by plugging the cord back in.
Step 12: Return the oven to its usual position.
Watch the video below for a visual of how to replace the inner glass of an Estate oven door.
If the steps above don’t work for you, follow the steps listed below to replace the inner glass of your Estate oven door…
Step 1: Disconnect the power to the oven by unplugging the cord from the outlet. You will need to go to the oven’s rear to do this.
Step 2: Open the oven door partially.
Step 3: Grip the sides of the door and pull each door hinge out of the slots in the corners of the oven’s frame.
Step 4: Set the door down on a sturdy surface lined with a cloth.
Step 5: Now, use a Philips head screwdriver to take out the four screws at the bottom of the door.
Step 6: Slide the outer glass off the door.
Step 7: Remove the two trims on the sides of the oven door as well.
Step 8: Take out the two screws at the bottom of the door which hold the steam shield in place.
Step 9: Set it aside.
Step 10: Use the Philips head screwdriver to take out the two screws which hold the top cap and handle assembly in place.
Step 11: Lift the top cap off the oven.
Step 12: Unscrew the vent spacer from the top of one door hinge.
Step 13: Also remove the small metal bracket by lifting it up. The bracket is also on the top of the hinge.
Step 14: Take out the screw at the bottom of the door which holds the hinge to the door and remove it completely.
Step 15: Slide the metal panel off the door glass and set it aside.
Step 16: If the top inner glass is the shattered one, remove it. However, if the bottom inner glass is the shattered one, take out the screws which hold it in place.
Step 17: Remove the remains on the bottom inner glass.
Step 18: Get a new inner glass for your Estate oven door.
Step 19: Position the new glass on your Estate oven door and hold it in place with the screws.
Step 20: Return the top inner glass also.
Step 21: Slide the metal panel onto the door making sure that it is properly positioned.
Step 22: Return the door hinge and secure with the screws.
Step 23: Reposition the metal bracket and vent spacer.
Step 24: Secure the vent spacer with the screw.
Step 25: Reposition the steam shield at the bottom of the door and secure it with the two screws.
Step 26: Return the top cap assembly and hold it in place with the two screws as well.
Step 27: Reposition the side trims.
Step 28: Slide the outer glass back onto the door and secure using the four screws.
Step 29: Lift the door.
Step 30: With the door straight up, insert each hinge into the slot. The hinges won’t go into the slots completely at this point.
Step 31: Open the door slightly.
Step 32: Lift the door and push the hinges into the slots.
Step 33: Open the door completely then shut it.
Step 34: Plug the cord back into the outlet.
Watch the video below for a visual of how to replace the inner glass of your Estate oven door.
How To Clean Estate Oven Door
Follow the steps below to clean your Estate oven door…
Step 1: Open the door of the oven.
Step 2: Get a bowl, some baking soda, and a soft sponge.
Step 3: Pour the baking soda into the bowl.
Step 4: Add a little water to the baking soda and mix to form a thick paste.
Step 5: Apply the paste on the door using the soft sponge.
Step 6: Leave the paste to sit for an hour.
Step 7: Afterwards, scrub the door gently with a wet sponge.
Step 8: Wipe the baking soda off the door using some paper towels.
Step 9: Spray some water on the door to rinse and wipe with a micro fiber cloth.
Step 10: Shut the door.
If you want to learn other ways to clean your Estate oven door, or you want to learn how to clean your Estate oven, read this article: How To Clean An Estate Oven [Detailed Guide] .
How To Replace Estate Oven Door Handle
Below, we have listed the steps you need to follow in order to replace your Estate oven door handle…
Step 1: Disconnect the oven’s power by unplugging the cord from the outlet. You will need to go to the oven’s rear to do this.
Step 2: Open the oven door slightly to the broiling position.
Step 3: Now, use some masking tape to tape around the door. This will prevent the outer glass from falling off when you remove the top cap.
Step 4: Use a Philips head screwdriver to take out the two screws which hold the top cap in place.
Step 5: Lift the cap off the oven door.
Step 6: Take out the two screws which hold the door handle to the top cap using the Philips screwdriver.
Step 7: Get a new Estate oven door handle.
Step 8: Position the handle on the door and hold it in place with the screws.
Step 9: Reposition the top cap on the oven door and secure it with the two screws.
Step 10: Peel the tap off the door.
Step 11: Shut the oven door.
Step 12: Plug the oven’s cord back into the outlet.
Watch the video below for a visual of how to replace your Estate oven door handle.
If the steps above don’t work on your oven model, follow the steps listed below to replace your Estate oven door handle…
Step 1: First, unplug the oven’s power cord from the outlet. To access the cord, you will need to pull the oven away from the wall.
Step 2: Open the oven door partially.
Step 3: Use a Philips screwdriver to unscrew the door’s top cap. There are two screws holding it in place.
Step 4: Lift the cap off.
Step 5: Slide the inner glass off door as well.
Step 6: Unscrew the handle from the door using a quarter inch nut driver or socket.
Step 7: Get a new Estate oven door handle.
Step 8: Position the handle on the door and hold it in place with the two screws.
Step 9: Slide the inner glass back onto the door.
Step 10: Return the top cap and hold it in place with the two screws.
Step 11: Shut the door of the oven.
Step 12: Plug the cord back into the outlet and return the oven to its usual position.
Watch the video below for a visual of how to replace an Estate oven door handle.