Does your Maytag oven door not close properly or has the door glass shattered? In this article, we will look at Maytag oven door problems and how to fix them.
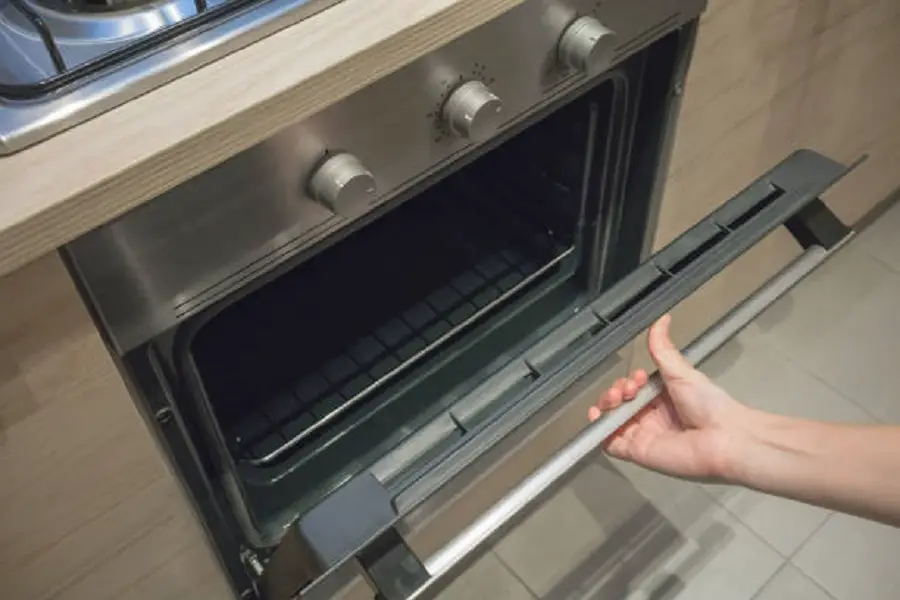
Table of Contents
Maytag Oven Door Locked — How To Fix
If your Maytag oven door has a manual lock, move it to the left to unlock it. If the child lock feature is on, turn it off and try opening the door. If none of these work, the door lock motor is faulty. Below are the steps you need to follow in order to replace your Maytag oven door lock motor…
Step 1: Pull the oven away from the wall to access the rear.
Step 2: Using a Philips head screwdriver, take out the screws which hold the back panels of the oven in place.
Step 3: Lift the panels off and set them aside.
Step 4: Note where each wire goes on the door lock assembly by taking a picture.
Step 5: Disconnect the wires connected to the door lock motor.
Step 6: Take out the screws which hold the door lock motor to the oven.
Step 7: Remove the door lock motor and push the rod back to unlock the door.
Step 8: Get a new door lock motor.
Step 9: Insert the rod into the door lock and position it on the oven.
Step 10: Secure the door lock to the oven using the screws.
Step 11: Reconnect the wires to the door lock. Make sure each wire goes to the right place.
Step 12: Reposition the oven’s back panels.
Step 13: Hold the panels in place with the screws.
Step 14: Plug the oven back in.
Step 15: Push the oven back into place.
Watch the video below if you would like a visual of how to replace the door lock in a Maytag oven.
Maytag Oven Door Not Closing All The Way — How To Fix
Below, we list the three possible reasons why your Maytag oven door won’t close all the way…
1. Door Gasket
This is the first possible reason why your Maytag oven door won’t close properly. Below, we have listed the steps you need to follow in order to replace your Maytag oven door gasket…
Step 1: Unplug the oven’s power cord from the outlet.
Step 2: Open the door of the oven.
Step 3: Pull out the ends of the door gasket from the bottom of the oven door.
Step 4: Unhook all the other door gasket clips from the holes in the frame of the oven door.
Step 5: Get a new door gasket.
Step 6: Insert the clips of the new door gasket into the holes.
Step 7: Push the ends into the bottom of the door.
Step 8: Shut the door.
Step 9: Plug the oven’s power cord back into the outlet.
Watch the video below for a visual of how to replace a Maytag oven door gasket.
2. Door Latch
If you have replaced the door gasket but your Maytag oven door won’t close properly, the next component you should replace is the door latch. Below are the steps you need to follow in order to replace your Maytag oven door latch…
Step 1: Unplug the oven’s power cord from the outlet.
Step 2: Open the oven door.
Step 3: If there are screws underneath the stove top, take them out.
Step 4: Lift the stove top and support it.
Step 5: Take out the screws which hold the metal panel on the top on the oven.
Step 6: Lift the metal panel off.
Step 7: Take out the two screws at the front off the oven which hold the door latch in place.
Step 8: Remove the rod from the door latch.
Step 9: Get a new door latch.
Step 10: Insert the rod into the new door latch.
Step 11: Position the door latch in the oven and hold it in place with the screws.
Step 12: Return the metal panel which covers the door latch.
Step 13: Hold the panel in place with the screws.
Step 14: Lower the stove top.
Step 15: If you took out any screws under the stove top, return them.
Step 16: Close the door of the oven.
Step 17: Plug the oven back into the outlet.
The video below will give you a visual of how to replace a Maytag oven door latch.
3. Door Hinges
This is the final possible reason why your Maytag oven door won’t close properly. If you have replace the door gasket and door latch and it still doesn’t fix the problem, follow the steps listed below to replace your Maytag oven door hinges…
Step 1: Pull the oven away from the wall.
Step 2: Unplug the oven’s power cord from the outlet.
Step 3: Open the door of the oven.
Step 4: There is a lock on each door hinge. Using a flat head screwdriver, flip the locks towards yourself.
Step 5: Close the door till it can’t go any further.
Step 6: Lift the door off and set it on a cloth lined sturdy surface.
Step 7: Using a Philips head screwdriver, take out the screws at the bottom of the oven door. There will be 3 to 5 screws.
Step 8: Remove the two side trim pieces of the oven door.
Step 9: Using a 5/16th inch nut driver, take out the screws which hold the two door hinges in place. There is one screw on each side.
Step 10: If there are screws at the top of the door, also take them out to remove the inner door assembly.
Step 11: Lift the inner door assembly off the outer one.
Step 12: Using a Philips head screwdriver, take out the other four screws which hold the door hinges in place.
Step 13: Remove the door hinges.
Step 14: Get new door hinges.
Step 15: Position the hinges on the door and hold them in place with the four Philips head screws.
Step 16: Lift the inner door panel and position it on the outer one.
Step 17: If you took out any screws at the top of the oven door, return them.
Step 18: Also return the other screws on the two sides of the oven door.
Step 19: Reposition the side trim pieces.
Step 20: Return the screws at the bottom of the oven door.
Step 21: Lift the oven door.
Step 22: Insert the door hinges into the slots on the sides of the oven.
Step 23: Open the oven door fully and flip the hinge locks back.
Step 24: Close the oven door.
Step 25: Plug the oven’s power cord back in.
Step 26: Return the oven to its usual position.
If you would like a visual of how to replace Maytag oven door hinges, watch the video below.
Check out these articles…
Kitchenaid Oven Is Not Working [How To Fix]
Maytag Oven Element [Problems & Solutions]
Maytag Oven Self Cleaning [How To, Problems & Solutions]
How To Calibrate A Maytag Oven [Quick Guide]
Maytag Oven Igniter [Problems & Solutions]
How To Put Maytag Oven Door Back In
Below, we have listed the steps you need to follow in order to put your Maytag oven door back on…
Step 1: Lift the door.
Step 2: Insert the door hinges into the slots on the sides of the oven frame.
Step 3: Open the oven door fully.
Step 4: Flip the locks on the door hinges backwards to hold the door in place.
Step 5: Shut the oven door.
Maytag Oven Door Handle Broken — How To Fix
If your Maytag oven door handle is broken, follow the steps below to replace it…
Step 1: Pull the oven away from the wall.
Step 2: Unplug the oven’s power cord from the outlet.
Step 3: Open the door of the oven.
Step 4: There are locks on the door hinges. Using a flat head screwdriver, flip the locks.
Step 5: Close the door till it can’t go any further.
Step 6: Lift the door off.
Step 7: Set the door on a sturdy surface lined with a cloth.
Step 8: Take out the screws at the bottom of the oven which hold the trim piece in place using a Philips head screwdriver. There should be three screws.
Step 9: Remove the trim piece and lift off the outer door glass.
Step 10: Take out the four screws which hold the top vent with the door handle on it.
Step 11: Take out the two screws which hold the brackets and door handle to the vent.
Step 12: Get a new door handle and position it on the vent.
Step 13: Secure the door handle and brackets to the vent using the screws.
Step 14: Reposition the vent on the oven door and hold it in place with the screws.
Step 15: Slide the outer door glass back onto the door assembly.
Step 16: Reposition the bottom trim piece and hold it in place with the three screws.
Step 17: Lift the oven door and position the hinges in the slots on the sides of the oven frame.
Step 18: Open the door fully.
Step 19: Flip the hinge locks back to hold the door in place.
Step 20: Close the oven door.
Step 21: Plug the oven back in.
Step 22: Return the oven to its usual position.
If you would like a visual of how to replace your Maytag oven door handle, watch the video below.
How To Tighten Maytag Oven Door Handle
Below, we show you how to tighten your Maytag oven door handle…
Step 1: Unplug the oven’s power cord and open the door.
Step 2: Flip the locks on the door hinges towards yourself using a flat head screwdriver.
Step 3: Close the door till it stops.
Step 4: Lift the door off and set on a cloth lined surface.
Step 5: Using a Philips head screwdriver, take out the three screws which hold the door’s bottom trim piece in place.
Step 6: Remove the trim piece and slide off the oven’s outer door glass.
Step 7: Take out the screws which hold the vent to the oven door.
Step 8: Tighten the screws which hold the door handle to the vent.
Step 9: Screw the vent back to the oven door.
Step 10: Slide the outer door glass back and reposition the bottom trim piece.
Step 11: Secure the trim piece with the three screws.
Step 12: Lift the oven door and insert the hinges into the slots in the sides of the oven.
Step 13: Open the door fully and flip the hinge locks back.
Step 14: Shut the door and plug the oven’s power cord back into the outlet.
How To Remove Maytag Oven Door
Follow these steps to remove your Maytag oven door…
Step 1: Open the door.
Step 2: There is a lock on each door hinge. Flip the lock forward using a flat head screwdriver.
Step 3: Close the door till it stops.
Step 4: Lift the door up, tilt it in, and remove it.
Maytag Oven Door Squeaks When Hot — How To Fix
To fix this problem, follow the steps listed below…
Step 1: Open the door of the oven.
Step 2: Get a high temperature oil.
Step 3: Apply the oil on the two door hinges.
Step 4: Close the oven door.
Maytag Oven Door Glass Shattered — How To Fix
If your Maytag oven door glass shattered, it will need to be replaced. We will show you how to replace an inner and outer Maytag oven door glass.
Outer Glass
Follow the steps below to replace your Maytag oven outer door glass…
Step 1: Unplug the oven’s power cord from the outlet.
Step 2: Open the oven door and flip the locks on the hinges using a flat head screwdriver.
Step 3: Close the door till it can’t go any further.
Step 4: Lift the door off and set on a towel lined surface.
Step 5: Use a Philips head screwdriver to take out the screws at the bottom of the oven door.
Step 6: Remove the trim piece and set it aside.
Step 7: Lift the outer door glass or whatever remains there are.
Step 8: Get a new outer door glass.
Step 9: Slide the new outer door glass onto the door assembly.
Step 10: Reposition the trim piece.
Step 11: Hold the trim piece in place with the three Philips head screws.
Step 12: Lift the door up.
Step 13: Insert the door hinges into the slots on the sides of the oven frame.
Step 14: Open the oven door fully.
Step 15: Flip the hinge locks back to hold the door in place.
Step 16: Close the door and plug the oven’s power cord back into the outlet.
Watch the video below if you would like a visual of how to replace your Maytag oven door outer glass.
Inner Glass
To replace your Maytag oven door inner glass, follow the steps listed below…
Step 1: Unplug the oven’s power cord and open the door.
Step 2: Use a flat blade screwdriver to flip the locks on the door hinges towards yourself.
Step 3: Close the door till it can’t go any further.
Step 4: Lift the door off and set it on a cloth lined surface.
Step 5: Using a Philips head screwdriver, take out three screws at the bottom of the oven door.
Step 6: Remove the bottom trim piece.
Step 7: Slide off the outer door glass.
Step 8: Take out the screws which hold the vent assembly to the door assembly.
Step 9: Remove the vent assembly.
Step 10: Take out the screws securing the metal panel which hold the inner door glass in place.
Step 11: Set the metal panel aside.
Step 12: Lift the inner glass out.
Step 13: Bend back the tabs which hold the metal piece to the inner glass. Be careful as you do this so that the glass doesn’t cut you.
Step 14: Remove the inner glass and get a new one.
Step 15: Position the metal piece on the inner glass.
Step 16: Place the inner glass back on the door assembly.
Step 17: Return the metal panel and the screws which hold it in place.
Step 18: Reposition the vent assembly and the screws which hold it in place.
Step 19: Slide the outer door glass back onto the door assembly.
Step 20: Return the bottom trim piece.
Step 21: Hold the trim piece in place using the three Philips head screws.
Step 22: Lift the oven door and insert the hinges into the slots in the sides of the oven frame.
Step 23: Open the oven door fully and flip the hinge locks back.
Step 24: Close the door and plug the oven’s power cord back in.
Watch the video below for a visual of how to replace the inner door glass of a Maytag oven door.
Maytag Oven Door Lock Override
If you want to override your Maytag oven door lock, follow these steps…
Step 1: Switch the oven’s circuit breaker off.
Step 2: Leave the breaker off for 5 minutes.
Step 3: After 5 minutes, switch the oven’s circuit breaker back on.
If this doesn’t work, you may need to leave the oven to unlock on its own if you just finished using the self clean feature.