In this article, you will learn how to dry kamias in the oven, transforming them into delicious, tangy treats. This process is not only simple but also highly effective, allowing you to enjoy these tropical fruits year-round. Whether you’re a culinary enthusiast or a novice in the kitchen, our step-by-step guide will ensure you achieve perfect results every time.
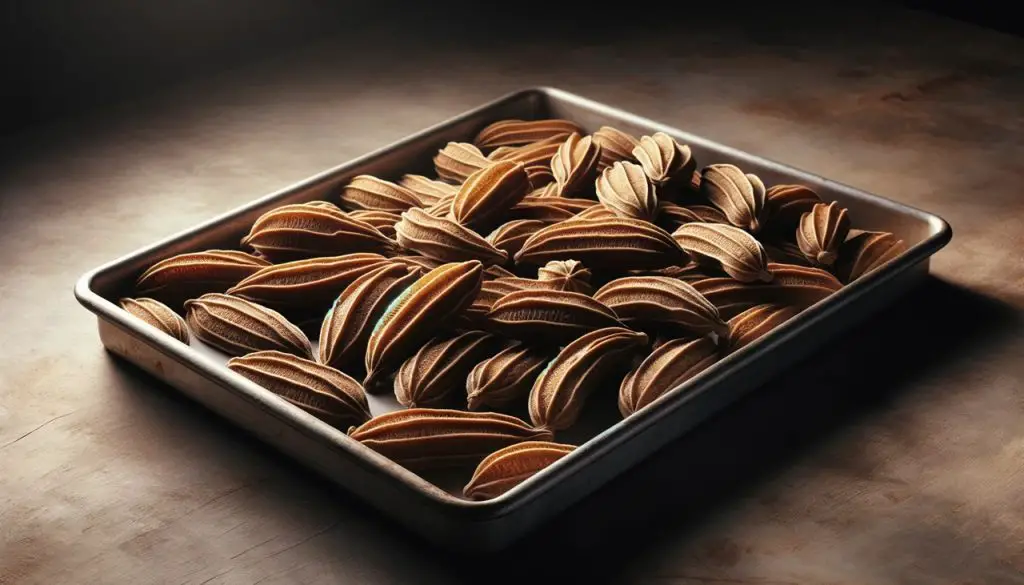
Table of Contents
Things You’ll Need: How to Dry Kamias in the Oven
- Fresh kamias
- Baking sheet
- Parchment paper or a silicone baking mat
- Kitchen towel
- Knife
- Optional: Spices or sugar for seasoning
- Airtight container or Ziploc bags
How to Dry Kamias in the Oven – Step-by-Step Instructions
Follow the steps below to dry kamias in the oven…
Step 1: Preparing the Kamias
The first step in drying kamias is to choose fresh, ripe fruits. Look for kamias that are firm, unblemished, and have a bright green color. Avoid any that are overly soft, discolored, or show signs of decay, as these will not dry well.
Washing the Kamias: Once you have your selection, it’s time to wash them. Place the kamias under cool, running water. Gently rub the surface of each fruit with your fingers to dislodge any dirt, dust, or residual pesticides that might be clinging to the skin. This step is crucial for ensuring that your dried kamias are clean and safe to eat.
Drying the Kamias: After washing, take a clean kitchen towel and lay it flat on the counter. Spread the kamias out on the towel in a single layer. Gently pat the tops of the kamias with another towel or let them air dry for a few minutes. This is an important step as any excess moisture on the surface of the kamias can lead to uneven drying or possible mold growth during the drying process.
Step 2: Slicing the Kamias
Ensure you have a sharp knife. A dull knife can squish the fruit and make it harder to achieve uniform slices. If you’re not confident in your knife skills, you might consider using a mandolin slicer for more consistent thickness.
Slicing the Kamias: Hold a kamias securely with one hand, and with your knife in the other hand, slice off the stem end. Begin slicing the kamias from one end to the other, aiming for slices that are approximately 1/4 inch thick.
Consistency in slice thickness is key here, as it ensures that all pieces will dry at the same rate. If the slices are too thick, they won’t dry properly, and if they’re too thin, they might burn or dry out too quickly.
Arranging for Drying: As you slice, lay the pieces out on a plate or tray. Keep them separate to avoid sticking. This methodical approach to slicing and arranging will set you up for success in the subsequent steps of the drying process.
Step 3: Preparing the Oven and Baking Sheet
For drying kamias, it’s important to use a low and consistent heat. Begin by setting your oven to 150°F (65°C). This temperature is ideal as it’s warm enough to remove moisture from the fruit, but not so hot as to cook it. If your oven doesn’t go this low, set it to the lowest possible temperature and keep the oven door slightly ajar to prevent overheating.
Why Low Heat is Essential: Drying fruits like kamias isn’t about cooking; it’s about dehydrating. High heat can cause the sugars in the fruit to caramelize, altering the flavor and potentially burning them. Gentle, consistent heat ensures that your kamias dry uniformly, retaining their natural tartness and nutrients.
Preparing Your Baking Sheet: Take a baking sheet and line it with parchment paper or a silicone baking mat. The lining serves a dual purpose – it prevents the kamias from sticking to the baking sheet and makes cleanup easier.
Parchment paper is a great choice as it’s disposable and can handle low oven temperatures without burning. A silicone mat is an eco-friendly alternative, as it’s reusable and also non-stick.
Spacing Out Your Baking Sheets: If you have a large quantity of kamias and need to use multiple baking sheets, make sure to space them out in the oven. This allows for better air circulation and more even drying. You may need to rotate the baking sheets during the drying process to ensure uniformity.
Read more oven drying topics here – How to Oven Dry Stuff: Your Ultimate Guide to Drying Various Items in the Oven
Step 4: Arranging the Kamias on the Baking Sheet

Now, take your sliced kamias and arrange them on your lined baking sheet. Lay each slice flat and ensure they are in a single layer. Overlapping slices can lead to uneven drying – some parts may remain moist while others become too dry.
Maximizing Space While Ensuring Airflow: While you want to make the most of the space on your baking sheet, it’s crucial to leave a little gap between each slice of kamias. This space allows air to circulate around each slice, ensuring they dry evenly. Think of it as allowing each piece its own ‘drying zone.’
Double-Checking Before Drying: Once all the slices are laid out, take a moment to double-check. Ensure that none of the slices are folded or overlapping. Each piece should be lying flat and separate from its neighbors. This attention to detail will pay off in the quality of your dried kamias.
Step 5: Drying the Kamias
Gently slide the baking sheet with the arranged kamias slices into the preheated oven. Position the sheet on the middle rack to ensure even heat distribution. If you’re using multiple baking sheets, you may use the upper and lower racks, but remember to rotate them during the drying process.
Monitoring the Drying Process: The drying process for kamias in the oven is a slow and steady one. It’s not a ‘set and forget’ task. Start by setting a timer for one hour to remind you to check on the progress. When you check, you’re not just looking at the time passed but observing the changes in the kamias. They should be slowly losing moisture, becoming more shriveled and leathery.
Adjusting the Time Based on Slice Thickness: The thickness of your slices will greatly influence drying time. Thinner slices may take less time, possibly 3 to 4 hours, whereas thicker slices could take longer, up to 6 hours or more. It’s crucial to monitor and adjust the drying time based on what you observe.
Oven Variations: Keep in mind that ovens vary in their temperature accuracy and distribution of heat. If you know your oven runs hotter or has hot spots, adjust the position of the baking sheet or the drying time accordingly.
Step 6: Checking for Doneness
You’ll know the kamias are done when they exhibit a leathery and slightly chewy texture. They should no longer feel spongy or moist, but they shouldn’t be so dry that they become brittle or crisp. The idea is to remove enough moisture to preserve them while retaining some chewiness.
Conducting the Touch Test: Carefully open the oven and, using an oven mitt, slightly touch a slice of kamias. It should feel dry to the touch, not sticky or soft. If there’s any sign of moisture or if the slice feels pliable, it needs more time in the oven.
Cooling the Kamias: Once you determine that the kamias are properly dried, remove the baking sheet from the oven. Let the kamias cool directly on the baking sheet. This cooling period allows them to dry out a little more, as they will continue to lose moisture even outside of the oven.
Cooling on the baking sheet also prevents them from sticking together or becoming too moist if transferred to a container while still warm.
Step 7: Storing the Dried Kamias
Before you even think about storage, it’s crucial that your dried kamias are completely cooled to room temperature. This might take anywhere from 30 minutes to an hour, depending on the ambient temperature. Why is this important? Storing kamias while they are still warm can lead to condensation inside the storage container, which in turn can cause mold growth or spoilage.
Selecting the Right Container: For storage, choose an airtight container. This could be a zip-top plastic bag, a glass jar with a tight-sealing lid, or a plastic container with a secure closure. The key is that the container must be airtight to prevent any moisture from the air from getting in and rehydrating the kamias, which could spoil them.
The Importance of Airtight Storage: Keeping the kamias in an airtight container is crucial for maintaining their texture and flavor. Exposure to air can lead to oxidation, loss of flavor, and could make your kamias chewier or harder than desired. An airtight container keeps them in their best state.
Choosing the Storage Location: Find a cool, dry place in your kitchen or pantry for storage. This should be away from direct sunlight, heat sources, and moisture.
A cupboard or a pantry shelf is usually ideal. Avoid storing them near the stove, sink, or in a refrigerator. The refrigerator can introduce moisture and cause the kamias to become soggy, while heat sources can lead to them drying out further or becoming stale.
Duration of Storage: Properly dried and stored kamias can last for several months, maintaining their quality and flavor. The exact shelf life will depend on how well they were dried and how airtight the storage container is. It’s always a good practice to label your container with the date of drying so you can keep track of their age.
Periodic Checks: Even in storage, it’s a good idea to check on your dried kamias occasionally. Look for any signs of moisture, mold, or changes in texture or smell. If they seem to be losing their quality, consider using them up sooner rather than later.
Conclusion: How to Dry Kamias in the Oven
Congratulations! If you’ve followed this steps, that means you’ve successfully learned dried kamias in the oven. Enjoy these as a healthy snack or use them in your culinary creations.