If your Gorenje oven clock is not working or you would like to learn how to set it, this article is for you. Today, we will show you how to set the clock and fix other related issues.
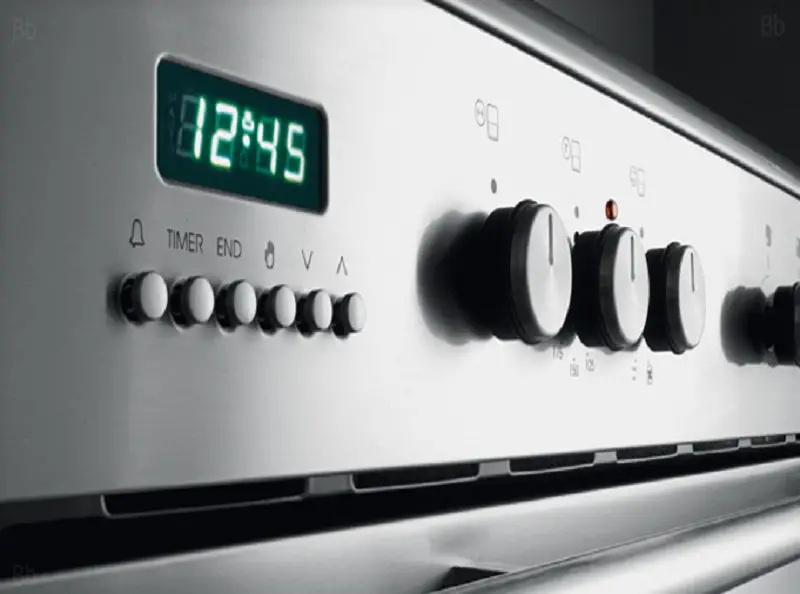
Table of Contents
How To Set Gorenje Oven Clock
Below, we have listed the steps you need to follow in order to set your Gorenje oven clock…
Step 1: If any oven function is running, turn it off.
Step 2: Tap the “clock” button till the clock icon appears on the display and you see “00:00”.
Step 3: Enter your desired time using the arrows on the control panel.
Step 4: Tap the “play” button to save your selection.
If the steps above for setting a Gorenje oven clock do not work on your oven model, follow the steps listed below…
Step 1: Turn the oven on.
Step 2: Press the last two buttons on the left side of the oven simultaneously.
Step 3: Using the small dial on the right, enter the time.
Step 4: Do not press any buttons on the oven for a few seconds. The clock will save the time automatically.
Watch the video below for a visual of how to set the clock on your Gorenje oven.
Gorenje Oven Clock Not Showing — How To Fix
If the clock isn’t showing on the display of your Gorenje oven, you most likely turned it off unintentionally. To turn the clock on, first locate the “clock” button on the oven’s control panel. Once you have located this button, press and hold it down for three seconds.
Gorenje Oven Clock Blinking — How To Fix
If your Gorenje oven clock won’t stop blinking, it may be because a power outage occurred. To stop the clock from blinking, you should reset it. Below, we have listed the steps you need to follow in order to reset the clock of your Gorenje oven…
Step 1: Locate your Gorenje oven’s circuit breaker.
Step 2: Once you have located the circuit breaker, switch it off for 10 minutes.
Step 3: After 10 minutes, switch the circuit breaker back on.
Step 4: Set the time on your Gorenje oven. If you don’t knob how to do this, read the “How To Set Gorenje Oven Clock” section above.
If you would like to learn how to reset a Gorenje oven, read this article: How To Reset a Gorenje Oven [Quick Guide]
Gorenje Oven Clock Not Working — How To Fix
If the clock on your Gorenje oven is not working, try resetting it first. If you don’t know how to do this, read the section above. If the clock of your Gorenje oven still won’t work, the clock control should be replaced. Below, we have listed the steps you need to follow in order to replace the clock control of your Gorenje oven…
Step 1: As always, make sure to disconnect the power to your Gorenje oven before starting the repair. Unplug the oven’s power cord from the outlet to do this. If your oven is installed to a cabinet, switch off the circuit breaker instead.
Step 2: Open your Gorenje oven door.
Step 3: The door should be uninstalled to make the oven easier to lift out. To do this, first flip the latches on the hinges forward.
Step 4: Push the door closed till it can’t go further.
Step 5: Grip the sides of the door and lift it off the oven.
Step 6: Set the door assembly aside on a sturdy surface lined with a cloth.
Step 7: Next, get a Philips head screwdriver.
Step 8: Use the Philips head screwdriver to take out the screws holding the oven to the cabinet. There are two screws on each side of the oven’s front frame.
Step 9: Once you have taken out the screws, lift the oven out of the cabinet.
Step 10: Set the oven on a sturdy surface.
Step 11: Using the Philips head screwdriver, take out the screws which hold the two top panels of your Gorenje oven in place.
Step 12: Lift the two top panels off and set them aside.
Step 13: Get a phone and take a photo of the wires connected to the clock control.
Step 14: Disconnect the wires from the clock control.
Step 15: Unscrew the clock control from the oven and get a new one.
Step 16: Position the new clock control on the panel and hold it in place with the screws.
Step 17: Reconnect the wires to the new clock control. Make sure that each wire goes to the right place.
Step 18: Reposition the two top panels on the oven.
Step 19: Hold the top panels in place using the Philips head screws.
Step 20: Lift the oven up and push it back into the cabinet.
Step 21: Return the four Philips head screws on the sides of the oven which hold it to the cabinet.
Step 22: Lift up the oven.
Step 23: Insert the two door hinges into the openings in the lower corners of the oven’s frame.
Step 24: Open the oven door completely.
Step 25: To hold the door in place, flip the hinge latches back.
Step 26: Shut the oven door.
Step 27: Reconnect the power to the oven by plugging the power cord back into the outlet or switching the circuit breaker back on.