Error codes are dreaded by oven owners. So, if you have a Kitchenaid oven error code and you don’t know why, this article is for you. We will show you how to fix Kitchenaid oven error codes.
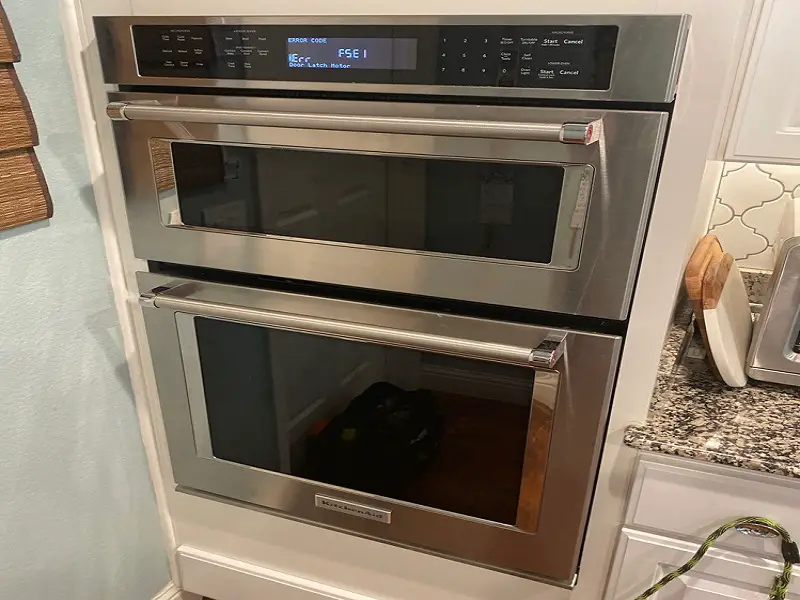
Table of Contents
Kitchenaid Oven Error Code F2e1 — How To Fix
This Kitchenaid oven error code indicates a problem with the control panel. To fix this Kitchenaid oven error code, the control panel will need to be replaced. We will show you how to replace the control panel of an old Kitchenaid electric range oven, Kitchenaid gas range oven, and a Kitchenaid double wall oven. Below, we have listed the steps you need to follow in order to replace the control panel of your old Kitchenaid electric range oven…
Step 1: Pull the oven away from the wall and unplug the power cord from the outlet.
Step 2: Take out the two screws on the rear of each oven side panel using a Philips head screwdriver.
Step 3: Lift the first panel off and set it aside.
Step 4: Do the same with the other side panel.
Step 5: Take out the two screws on the trim piece of the left side panel. Only take out the screw on the far right and the other screw on the far left.
Step 6: Slide the trim piece to the back then remove it.
Step 7: Take out the screw on the upper right of the oven’s left side.
Step 8: Open the door of the oven.
Step 9: Take out the three screws under the control panel which hold it to the oven.
Step 10: Tilt the control panel back and lift it off.
Step 11: Disconnect the ribbon cable from the board on the control panel plate.
Step 12: Take out the four screws holding the board to the panel.
Step 13: Lift the board off and take out the four screws of the touchpad you are replacing.
Step 14: Remove the touchpad assembly and get a new one.
Step 15: Get a new touchpad and position it on the control panel plate by passing the ribbon cable through the slot.
Step 16: Hold the touchpad to the control panel plate with the four screws.
Step 17: Return the control board and the screws which hold it in place.
Step 18: Reposition the control panel assembly on the oven and return the three screws under it which hold it in place.
Step 19: Close the oven door and go back to the left side of the oven.
Step 20: Return the screw on the upper right corner of the oven’s side.
Step 21: Return the trim piece and the two screws which secure it.
Step 22: Reposition the side panels and secure them with the screws.
Step 23: Peel off the protective plastic cover on the new touchpad.
Step 24: Plug the oven’s power cord back into the outlet.
The video below will show you how to replace the control panel or touchpad of an old Kitchenaid range oven.
To fix the Kitchenaid oven error code F2e1 on a Kitchenaid gas range, follow the steps below to replace the control panel…
Step 1: Pull the oven away from the wall and unplug the power cord.
Step 2: Shut off the gas supply.
Step 3: Open the oven door.
Step 4: There is a metal plate under the control panel, take out the two screws that hold it in place.
Step 5: Take out the other two screws which secure the control panel.
Step 6: Pull off the control knobs and lift the control panel off. Make sure to note where each control knob goes.
Step 7: Disconnect the wire and ribbon cable from the control board on the panel assembly.
Step 8: Set the control assembly on a surface lined with a cloth.
Step 9: Take out the five screws which hold the protective cover of the display board.
Step 10: Take out the screws which secure the brackets to the sides of the control panel.
Step 11: Get a new control panel.
Step 12: Position the brackets on the ends of the control panel and secure them with the screws.
Step 13: Reposition the display board protective cover.
Step 14: Secure the protective cover with the five screws.
Step 15: Take the control panel assembly to the oven.
Step 16: Reconnect the wire and ribbon cable.
Step 17: Reposition the control panel and hold it in place with the two screws.
Step 18: Push the control knobs back onto the shafts on the control panel.
Step 19: Return the metal cover under the panel.
Step 20: Hold the cover in place with the screws.
Step 21: Shut the oven door.
Step 22: Plug the oven back in.
Step 23: Turn on the oven’s gas supply.
Step 24: Return the oven to its usual position.
Also follow the steps above to replace your control panel if you see the Kitchenaid oven error code F2e0, the Kitchenaid oven error code E6 F2, or the Kitchenaid oven error code E5 F2.
The video below will walk you through the process of replacing the control panel of a Kitchenaid gas range.
Below, we show you how to replace the control panel of a Kitchenaid double wall oven If you see the Kitchenaid oven error code F2e1…
Step 1: Locate the oven’s circuit breaker and switch it off.
Step 2: Open the two oven doors.
Step 3: Using a Philips head screwdriver, remove the screws which hold the oven to the cabinet. There are two screws on each side.
Step 4: Pull the oven out to about four inches.
Step 5: Take out the screws on the top sides of the oven which hold the control panel brackets. Each bracket is held in place with one screw.
Step 6: Take out the four screws on the sides of the control panel which hold it in place and lift it off.
Step 7: Disconnect the wire plug and grounding wire from the control panel.
Step 8: Get a new control panel and connect the wires to it.
Step 9: Position the panel on the oven and hold it in place with the four screws.
Step 10: Return the brackets and the screws which secure them.
Step 11: Push the oven back in and secure it with the four screws.
Step 12: Shut the oven door and switch its circuit breaker back on.
The video below will give you a visual of how to replace the control panel of a Kitchenaid double wall oven.
Check out these articles…
How To Calibrate A Kitchenaid Oven [Quick Guide]
Kitchenaid Oven Control Panel [Issues & Solutions]
Kitchenaid Oven Broiler [How To, Issues & Solutions]
Kitchenaid Oven Noise [How To Fix]
Kitchenaid Oven Display [Issues & Proven Solutions]
Kitchenaid Oven Error Code F1e0 — How To Fix
The Kitchenaid oven error code F1e0 indicates a problem with the oven control board. To fix this Kitchenaid oven error code, the control board should be replaced. Read this article to replace the control board in your Kitchenaid double wall oven and Kitchenaid range oven. Also read the article in the link if you see the Kitchenaid oven error code F1e1 or the Kitchenaid oven error code F1 E3.
Kitchenaid Oven Error Code F9e0 — How To Fix
This Kitchenaid oven error code appears when the oven is wrongly wired. Call a certified electrician to look at the wiring and make sure the oven is getting the right electrical supply.
Kitchenaid Oven Error Code F6e0 — How To Fix
To fix the Kitchenaid oven error code F6e0, follow the steps listed below…
Step 1: Switch off the oven’s circuit breaker.
Step 2: Leave the breaker off for 5 minutes.
Step 3: After 5 minutes, switch the circuit breaker back on.
Kitchenaid Oven Error Code E1 F5 — How To Fix
This Kitchenaid oven error code indicates a problem with the door lock assembly. To fix this error code, the door lock assembly should be replaced. We will show you how to replace the door lock assembly in a Kitchenaid range oven and a Kitchenaid double wall oven. Below, we have listed the steps for you to follow in order to replace the door lock assembly in a Kitchenaid range oven…
Step 1: Pull the oven away from the wall.
Step 2: Unplug the oven’s power cord.
Step 3: Open the door of the oven and use a Philips head screwdriver to take out the two screws which hold the front of the door lock assembly. There are two screws on the front of the oven frame.
Step 4: Go to the oven’s rear and take out the two screws which hold the upper panel’s support bracket in place.
Step 5: Take out the other screws which hold the oven’s lower back panel in place.
Step 6: Lift the panel and set aside.
Step 7: Disconnect the wire connector from the door assembly on the right.
Step 8: Take out the screws which hold the door assembly in place.
Step 9: Remove the door lock assembly and get a new one.
Step 10: Slide the new door lock assembly into the oven and secure with the screws. Make sure the end of the assembly protrudes through the opening at the front of the oven.
Step 11: Connect the wire connector to the door lock assembly.
Step 12: Reposition the oven’s lower back panel and secure it with the screws.
Step 13: Return the upper panel’s support bracket and the screws which hold it in place.
Step 14: Return the two screws at the front of the oven frame which secure the end of the door lock assembly.
Step 15: Shut the door.
Step 16: Plug the oven back in.
The video below will show you how to replace the door lock assembly in a Kitchenaid range oven.
Below, we walk you through the steps to follow in order to replace your Kitchenaid double wall oven’s door lock assembly…
Step 1: Locate the oven’s circuit breaker and switch it off to avoid the risk of electrocution.
Step 2: Open the door of the upper oven or lower oven depending on which door lock assembly you want to replace.
Step 3: Take out the four screws which hold the black vent in place.
Step 4: Remove the vent and set it aside.
Step 5: The door lock assembly is inside the opening. Take out the two screws which secure it using a quarter inch wrench.
Step 6: Push the door lock assembly back and pull it forward.
Step 7: Note where each wire goes on the door lock assembly.
Step 8: Disconnect the wires.
Step 9: Test the door lock for continuity using a multimeter. If there is no continuity, the door lock should be replaced.
Step 10: Get a new door lock and take it to the oven.
Step 11: Connect the wires to the door lock making sure that each one goes to the right place.
Step 12: Position the door lock in the oven opening.
Step 13: Hold the door lock in place with the two screws.
Step 14: Reposition the oven’s front vent and secure with the four screws.
Step 15: Shut the door.
Step 16: Switch the circuit breaker back on.
Also follow the steps above to replace your door lock assembly if you see the Kitchenaid oven error code F5e1, the Kitchenaid oven error code F7e0, or the Kitchenaid oven error code F5 E7.
If you would like a visual of how to replace the door lock in a Kitchenaid oven, watch the video below.
Kitchenaid Oven Error Code E3 — How To Fix
The Kitchenaid oven error code E3 indicates a problem with the temperature sensor. To fix this Kitchenaid oven error code, the temperature sensor should be replaced. We will show you how to replace the sensor both in a Kitchenaid double wall oven and a Kitchenaid range oven. To replace your Kitchenaid double wall oven sensor, do the following…
Step 1: Locate the circuit breaker and switch it off to avoid the risk of electrocution.
Step 2: Open the door of the oven with the faulty sensor.
Step 3: Slide out the oven racks and set them aside.
Step 4: Take out the two screws on the upper back wall of the oven which secure the broil element with a quarter inch nut driver or Philips head screwdriver.
Step 5: Take out the other two screws on the top wall as well.
Step 6: Carefully lower the broil element down.
Step 7: Now take out the two screws which hold the sensor to the oven’s back wall.
Step 8: Carefully pull out the sensor and disconnect the wire plug. Make sure the wire plug doesn’t fall through.
Step 9: Get a new temperature sensor and take it to the oven.
Step 10: Connect the wire plug to the sensor.
Step 11: Push the sensor in and secure with the screws.
Step 12: Reposition the broil element and return the screws at the top which secure it.
Step 13: Return the other screws on the upper back wall which secure it as well.
Step 14: Slide the oven racks back in.
Step 15: Shut the oven door.
Step 16: Switch the oven’s circuit breaker back on.
The video below will show you how to replace a Kitchenaid double wall oven temperature sensor.
Follow these steps to replace the sensor in a Kitchenaid range…
Step 1: Pull the oven away from the wall and unplug the power cord to avoid the risk of electrocution.
Step 2: Go to the oven’s rear and take out the three screws on the right and left side which hold the brackets in place.
Step 3: Remove the brackets.
Step 4: Lift the back panel off and set it aside.
Step 5: Disconnect the wire plug from the temperature sensor on the right.
Step 6: Take out the screw which holds the temperature sensor in place.
Step 7: Pull out the sensor.
Step 8: Get a new sensor and position it in the oven.
Step 9: Hold the sensor to the oven with the screw.
Step 10: Reconnect the wire plug.
Step 11: Reposition the oven’s back panel and return the side brackets.
Step 12: Secure the brackets with the screws.
Step 13: Plug the oven back in.
Step 14: Push the oven back into place.
Also follow the steps above to replace your temperature sensor if you see the Kitchenaid oven F3 E2 or the Kitchenaid oven error code F6e1.
The video below will show you how to replace a Kitchenaid range sensor.
Kitchenaid Oven Error Code F8e0 — How To Fix
The Kitchenaid oven error code F8e0 appears as the cause of a faulty cooling fan. We will walk you through the steps you need to follow to replace the cooling fan in a Kitchenaid electric range, Kitchenaid gas range, and a Kitchenaid double wall oven. Follow the steps listed below to replace your Kitchenaid gas range’s cooling fan…
Step 1: Shut off the oven’s gas supply.
Step 2: Pull the oven away from the wall and unplug the power cord from the outlet.
Step 3: Lift off the burner grates and set them aside.
Step 4: Open the oven door and take out the two screws under the control panel.
Step 5: Remove the metal cover under the panel and set it aside.
Step 6: Note where each control knob goes on the panel then pull them off.
Step 7: Take out the two screws which hold the control panel in place.
Step 8: Lift the panel up and support it with something to avoid straining the wires.
Step 9: Take out the three screws at the front of the stove top which secure it.
Step 10: Take out the other two screws on the back corners of the stove top which secure it also.
Step 11: Lift off the burner assemblies from the stove top. The burner assembly consists of the cap and base.
Step 12: Take out the screws you see which hold the orifice holders to the stove top.
Step 13: Lift the stove top and set it aside.
Step 14: Remove the screws holding the oven’s lower rear panel in place.
Step 15: Take out the three screws on the right and left side of the oven’s rear which hold the brackets.
Step 16: Remove the brackets and lift the oven’s panel off.
Step 17: Take out the two screws on the left side of the oven’s top which hold the support panel of the orifice holders in place.
Step 18: Take out the other four screws which hold the oven’s left side panel in place.
Step 19: Lift the side panel off and set it aside.
Step 20: Take out the screws on the left front bracket which secure the cooling fan to it.
Step 21: Remove the cooling fan.
Step 22: Disconnect the wire plugs from the cooling fan and get a new one.
Step 23: Remove the seal on the old cooling fan and position it on the new one.
Step 24: Take the cooling fan to the oven and connect the wire plugs to it.
Step 25: Position the cooling fan in the oven and secure to the bracket with the screws.
Step 26: Reposition the oven’s left side panel.
Step 27: Return the four screws which hold the left side panel in place.
Step 28: Also return the two screws which hold the orifice holders’ support panel to the left side panel.
Step 29: Reposition the oven’s upper back panel.
Step 30: Return the brackets to the left and right side of the oven’s rear.
Step 31: Hold the brackets in place with the six screws
Step 32: Reposition the oven’s lower panel and hold it in place with the two screws.
Step 33: Lift the stove top and place it back on the oven. Make sure the orifice holders stick out through the holes in the stove top.
Step 34: Secure the orifice holders to the stove top with the screws.
Step 35: Place the burner assemblies back on the stove top.
Step 36: Return the screws on the rear corners of the stove top.
Step 37: Also return the three screws at the front of the stove top.
Step 38: Reposition the control panel and secure with the two screws.
Step 39: Push the control knobs back into place and reposition the metal cover under the control panel.
Step 40: Hold the metal cover in place with the two screws and shut the oven door.
Step 41: Plug the oven’s power cord back into the outlet.
Step 42: Turn the oven’s gas supply back on.
The video below will give you a visual of how to replace the cooling fan in a Kitchenaid gas range.
If you see the Kitchenaid oven error code F8e0, follow the steps listed below to replace the cooling fan in a Kitchenaid electric range…
Step 1: Unplug your oven’s power cord from the outlet or switch off the circuit breaker to avoid the risk of electrocution.
Step 2: Open the oven door and take out the two screws under the control panel with a Philips head screwdriver.
Step 3: Set the metal cover under the panel aside.
Step 4: Take out the other two screws on the corners under the control panel which secure it.
Step 5: Lift the panel up and support it with a rope or something in order to avoid straining the wires connected to it.
Step 6: Take out the five screws which hold the stove top in place. There are three screws at the front and two screws on the rear corners of the stove top.
Step 7: Lift the stove top and take out the four screws which hold the stove elements’ support panel in place.
Step 8: Move the panel back a bit and take out the screws on the left front bracket which secure the cooling fan.
Step 9: Disconnect the wire plugs from the cooling fan and get a new one.
Step 10: Transfer the black seal from the old fan to the new one.
Step 11: Connect the wire plugs to the cooling fan and hold it in place with the screws.
Step 12: Screw the support panel back to the oven.
Step 13: Reposition the stove top and hold it in place with the screws.
Step 14: Reposition the control panel and hold it in place with the screws.
Step 15: Return the metal cover and the screws which hold it in place.
Step 16: Close the oven door and plug the oven back in.
The video below will show you how to replace a Kitchenaid electric range cooling fan.
Follow the steps below to replace your Kitchenaid double wall oven cooling fan if you see the Kitchenaid oven error code F8e0…
Step 1: Locate the oven’s circuit breaker and switch it off to avoid the risk of electrocution.
Step 2: Open the door of the lower oven and take out the racks.
Step 3: Flip the locks on the door hinges down to release the door.
Step 4: Close the door till it stops.
Step 5: Lift the door off and set on surface lined with a towel or cloth.
Step 6: Open the door of the upper oven and do the same.
Step 7: There is a vent at the bottom of the oven held in place by two screws. Take out the two screws which secure the bottom vent using a Philips head screwdriver.
Step 8: Set the vent aside.
Step 9: Take out the four screws on the sides of the oven frame using the same screwdriver.
Step 10: Pull the oven out from the cabinet with the help of an assistant and set it on a piece of cardboard.
Step 11: Go to the oven’s rear and take out the screws which hold the upper and lower rear panels in place.
Step 12: Set the panels aside.
Step 13: If you want to replace the cooling fan of the upper oven, take out the screws which hold the baffle under it. If you want to replace the cooling fan of the lower oven, take out the screws which hold the access panel of the bake element above it.
Step 14: Disconnect the wires to fully remove the access panel.
Step 15: Disconnect the wire plugs from the cooling fan.
Step 16: Take out the screws which hold the cooling fan to the oven.
Step 17: Remove the cooling fan and get a replacement.
Step 18: Remove the three bumpers on the old cooling fan and place them on the new one.
Step 19: Take the new cooling fan to the oven and secure with the screws.
Step 20: Connect the wire plugs to the cooling fan.
Step 21: If you removed the bake element access panel, return it and connect the wires back to the bake element terminals. If you removed the baffle, return it and hold in place with the screws.
Step 22: Reposition the upper and lower rear panels on the oven.
Step 23: Hold the panels in place with the screws.
Step 24: Have someone help you lift the oven back into the cabinet.
Step 25: Secure the sides of the oven to the cabinet using the four screws.
Step 26: Reposition the bottom vent and hold it in place with the screws.
Step 27: Lift the bottom oven door and insert the hinges into the slots on the sides of the oven.
Step 28: Open the door fully and flip the hinge locks back.
Step 29: Do the same with the upper oven door.
Step 30: Slide the racks back into the two ovens.
Step 31: Shut the oven doors.
Step 32: Switch your oven’s circuit breaker back on.
Watch the video below for a visual of how to replace the cooling fan in a Kitchenaid double wall oven.
Kitchenaid Oven Error Code PF — How To Fix
The Kitchenaid oven error code PF comes as the result of a power failure. This problem can be fixed by simply resetting the oven.