If your Zanussi oven fan is not working or it is extremely noisy, this article is for you. Today, we will look at Zanussi oven fan problems and how to fix them.
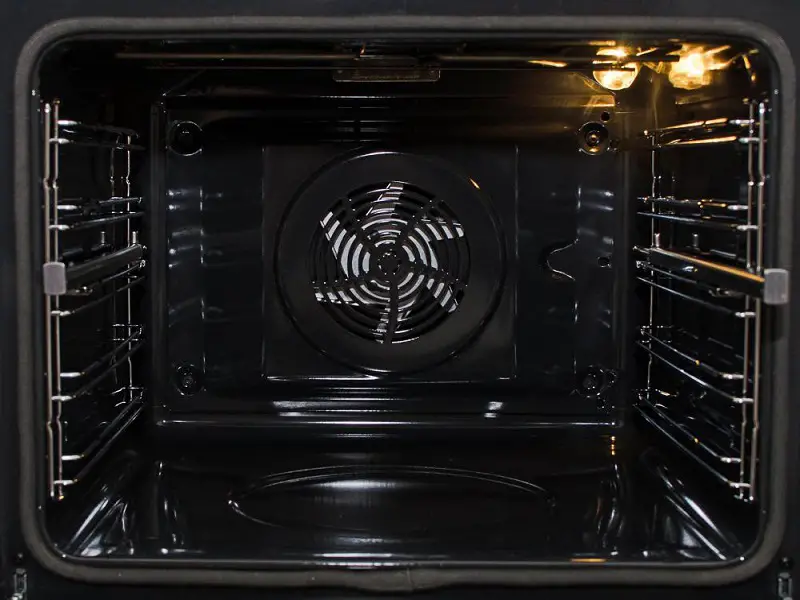
Table of Contents
Zanussi Oven Fan Not Working — How To Fix
If your Zanussi oven fan is not working, it will need to be replaced. We will show you how to replace the cooling fan in a Zanussi wall oven and a Zanussi range oven. Below, we have listed the steps you need to follow in order to replace the cooling fan in your Zanussi range oven…
Step 1: Pull the oven away from the wall.
Step 2: To avoid the risk of electrocution, unplug the oven’s power cord from the outlet.
Step 3: Get a Torx head screwdriver.
Step 4: Using the Torx head screwdriver, take out the screws which hold the small cover panel on the right side of the oven’s rear.
Step 5: Set the cover panel aside.
Step 6: Take out the screws which hold the other small cover panel at the top of the oven’s rear.
Step 7: Set the panel aside as well.
Step 8: Now, use the Torx head screwdriver to take out the screws which hold the oven’s main rear access panel in place.
Step 9: Lift the access panel off and set it aside.
Step 10: The cooling fan is located behind the rectangular panel on the oven’s upper rear. Take out the six Torx head screws to remove the panel.
Step 11: Lift the panel off.
Step 12: Take a picture of the cooling fan. This will help you remember where each wire goes on it.
Step 13: Disconnect the wires using a pair of needle nose pliers.
Step 14: Take out the screws which hold the cooling fan to the oven.
Step 15: Lift the cooling fan out of the oven.
Step 16: Get a new Zanussi oven fan.
Step 17: Position the new fan in the oven opening.
Step 18: Secure the fan to the oven using the screws.
Step 19: Connect the wires to the terminals of your new Zanussi oven fan. Make sure that each wire goes to the right place.
Step 20: Reposition the metal panel which covers the cooling fan.
Step 21: Hold the panel in place with the screws.
Step 22: Reposition the oven’s main rear access panel.
Step 23: Secure the access panel using the screws.
Step 24: Return the two cover panels on the oven’s rear and secure them with the screws.
Step 25: Reconnect the power to the oven by plugging the power cord back into the outlet.
Step 26: Push the oven back to the wall.
Below, we have listed the steps you need to follow in order to replace the cooling fan in your Zanussi wall oven…
Step 1: First, you will need to disconnect the oven’s power. To do this, locate the circuit breaker.
Step 2: Once you have located the circuit breaker, switch it off.
Step 3: Open the door of your Zanussi oven.
Step 4: Get a Philips head screwdriver.
Step 5: Using the Philips head screwdriver, take out the screws which hold the oven to the cabinet. There should be two screws on each side of the oven’s front frame.
Step 6: Lift the oven out of the cabinet. You may need another person for this.
Step 7: Set the oven on a sturdy surface.
Step 8: Get a Torx head screwdriver.
Step 9: Go to the oven’s rear.
Step 10: Using the Torx head screwdriver, take out the screws which hold the oven’s rear access panel in place.
Step 11: Lift the access panel off and set it aside.
Step 12: You should see the cooling fan on the oven’s upper rear. Take a picture of it to note where each wire goes.
Step 13: Disconnect the wires connected to the terminals of the cooling fan.
Step 14: Take out the screws which hold the cooling fan to the oven.
Step 15: Lift the cooling fan out of the oven.
Step 16: Get a new Zanussi oven fan.
Step 17: Position the new fan in the oven.
Step 18: Hold the cooling fan in place with the screws.
Step 19: Connect the wires to the terminals of your new Zanussi oven fan. Make sure that each wire goes to the right place.
Step 20: Reposition the oven’s rear access panel.
Step 21: Hold the access panel in place using the Torx head screws.
Step 22: Lift the oven up.
Step 23: Push the oven back into the cabinet.
Step 24: Using the four Philips head screws, secure the oven to the cabinet.
Step 25: Shut the door of your Zanussi oven.
Step 26: Reconnect the power to the oven by switching the circuit breaker back on.
Also follow the steps above to replace your cooling fan if your Zanussi oven cooling fan is making noise.
Watch the video below for a visual of how to replace the fan in a Zanussi oven.
If your Zanussi oven fan still won’t work after being replaced, check the wires next. Inspect the cooling fan’s wires for burns or cuts. If the wires are damaged in any way, they should be replaced. Contact a technician to replace your Zanussi oven fan wires.
Zanussi Convection Fan Not Working — How To Fix
If your Zanussi convection fan is not working, the motor will need to be replaced. Below, we have listed the steps you need to follow in order to replace your Zanussi oven fan motor..
Step 1: Disconnect the power to the oven. You can do this by switching the circuit breaker off or unplugging the power cord from the outlet.
Step 2: Open the door of your Zanussi oven.
Step 3: Pull out the racks in the oven.
Step 4: Set the racks aside.
Step 5: Get a Torx head screwdriver.
Step 6: Using the Torx head screwdriver, take out the screws which hold the fan blade’s cover in place. There are four screws.
Step 7: Lift the cover out of the oven and set it aside.
Step 8: Using a 10 millimeter nut driver, take out the nut which holds the fan blade to the motor shaft. You will need to turn the nut clockwise not counterclockwise.
Step 9: Slide the fan blade off the motor shaft.
Step 10: If your oven is installed to a cabinet, you will need to uninstall it. To do this, first get a Philips head screwdriver.
Step 11: Using the Philips head screwdriver, take out the four screws on the oven’s front frame which hold it to the cabinet. There are two screws on each side.
Step 12: Lift the oven out of the cabinet and set it on a sturdy surface.
Step 13: Go to the oven’s rear.
Step 14: Using the Torx head screwdriver, take out the screws which hold the oven’s back panel in place.
Step 15: Lower the panel and lift it off the oven.
Step 16: Note where each wire goes on the fan motor. You can take a picture if you want.
Step 17: Disconnect the wires connected to the terminals of the fan motor.
Step 18: Get a flat blade screwdriver.
Step 19: Using the screwdriver, bend back the metal bracket which secures the fan motor.
Step 20: While bending the bracket, turn the fan motor counterclockwise to release it.
Step 21: Remove the fan motor.
Step 22: Get a new Zanussi oven fan motor.
Step 23: Position the fan motor on the oven’s rear and turn it clockwise to hold it in place.
Step 24: Connect the wires to the terminals of your new Zanussi oven fan motor. Make sure each wire goes to the right place.
Step 25: Reposition the oven’s rear access panel.
Step 26: Hold the access panel in place with the Torx head screws.
Step 27: If you uninstalled the oven from the cabinet, lift it back in.
Step 28: Secure the sides of the oven to the cabinet using the Philips head screws.
Step 29: Slide the fan blade onto the shaft of the new fan motor.
Step 30: Hold the fan blade in place with the nut.
Step 31: Reposition the fan blade cover.
Step 32: Hold the cover in place with the four Torx head screws.
Step 33: Slide the racks back into the oven.
Step 34: Shut the oven door.
Step 35: Reconnect the power to the oven by switching the circuit breaker on or plugging the power cord back into the outlet.
Also follow the steps above to replace your fan motor if your Zanussi oven fan is noisy or your Zanussi oven fan is not spinning.
Watch the video below for a visual of how to replace your Zanussi oven fan motor.
If the fan motor in your Zanussi oven is not located on the rear, the steps above won’t work for you. Below, we have listed the steps you need to follow in order to replace a top located fan motor in a Zanussi oven…
Step 1: Pull the oven away from the wall.
Step 2: Unplug the oven’s power cord from the outlet.
Step 3: Get a Torx head screwdriver.
Step 4: Open the oven door.
Step 5: Using the Torx head screwdriver, take out the screws underneath the oven’s front panel which hold the metal cover in place. There are three screws.
Step 6: Carefully pull off the metal panel from the control panel assembly.
Step 7: Go to the oven’s rear.
Step 8: Use the Torx head screwdriver to take out the two screws which hold the stove top in place.
Step 9: Lift the stove top up and support it with a sturdy piece of wood.
Step 10: Note where each wire goes on the fan motor.
Step 11: Disconnect the wires from the terminals of the fan motor.
Step 12: Take out the screws which hold the fan motor to the oven.
Step 13: Lift the fan motor up.
Step 14: Get a new Zanussi oven fan motor.
Step 15: Position the fan motor on the top of the oven.
Step 16: Hold the fan motor in place with the screws.
Step 17: Connect the wires to the terminals of your new Zanussi oven fan motor. Make sure that each wire goes to the right place.
Step 18: Lower the stove top.
Step 19: Go to the oven’s rear and return the screws which hold the stove top in place.
Step 20: Reposition the metal panel on the control panel assembly.
Step 21: Hold the control panel assembly in place using the three Torx head screws.
Step 22: Shut the door of the oven.
Step 23: Plug the oven’s power cord back into the outlet.
Step 24: Push the oven back to the wall.
Zanussi Oven Fan Rattling — How To Fix
If your Zanussi oven fan is rattling, the fan blade is probably loose. To stop the rattling, you will need to tighten the fan blade. Below, we have listed the steps you need to follow in order to tighten your Zanussi oven fan blade…
Step 1: Disconnect the power to the oven for safety. Do this by unplugging the oven’s power cord from the outlet or switching the circuit breaker off.
Step 2: Open the oven door.
Step 3: Slide out the racks in the oven and set them aside.
Step 4: Get a Torx head screwdriver.
Step 5: Using the Torx head screwdriver, take out the four screws which hold the oven interior’s back panel in place.
Step 6: Lift the back panel off and set it aside.
Step 7: Get a 10 millimeter nut driver.
Step 8: Using the nut driver, tighten the nut which holds the fan blade in place. You will need to turn the nut counterclockwise to tighten. If the fan blade still feels loose after tightening the nut, it should be replaced.
Step 9: Unscrew the fan blade.
Step 10: Slide the fan blade off the motor shaft.
Step 11: Get a new Zanussi oven fan blade.
Step 12: Slide the new fan blade onto the shaft of the fan motor.
Step 13: Hold the fan blade in place with the nut.
Step 14: Reposition the back panel in the oven.
Step 15: Hold the panel in place with the four screws.
Step 16: Slide the racks back into the oven.
Step 17: Shut the oven door.
Step 18: Plug the oven’s power cord back into the outlet or switch the circuit breaker back on.
Zanussi Oven Fan Won’t Turn Off — How To Fix
If your Zanussi oven fan won’t turn off, the main thermostat may be faulty. Read this article: Zanussi Oven Element [How To, Issues & Solutions] to replace the main thermostat in your Zanussi oven. Note that not all ovens use thermostats. If your Zanussi oven fan won’t turn off after replacing the main thermostat, you should test and maybe replace the high limit thermostat. Follow these steps to test and replace the high limit thermostat in your Zanussi oven…
Step 1: Disconnect the power to the oven. Do this by switching the circuit breaker off.
Step 2: Open the oven door.
Step 3: Next, you will need to uninstall the oven from the cabinet. To do this, get a Philips head screwdriver.
Step 4: Take out the four screws on the sides of the oven’s front frame using the Philips head screwdriver.
Step 5: Lift the oven out of the cabinet.
Step 6: Set the oven on a sturdy surface.
Step 7: Get a Torx head screwdriver.
Step 8: Go to the oven’s rear.
Step 9: Using the Torx head screwdriver, take out the screws which hold the oven’s rear access panel in place.
Step 10: Lift the panel off and set it aside.
Step 11: Disconnect the wires from the terminals of the high limit thermostat.
Step 12: Get a multimeter.
Step 13: Using the multimeter, test the high limit thermostat for continuity. If the thermostat doesn’t have continuity, it should be replaced.
Step 14: Take out the screws which hold the high limit thermostat to the oven.
Step 15: Get a new high limit thermostat for your Zanussi oven.
Step 16: Position the high limit thermostat on the oven’s rear.
Step 17: Hold the high limit thermostat in place using the screws.
Step 18: Connect the wires to the high limit thermostat.
Step 19: Reposition the oven’s rear access panel and hold it in place with the Torx head screws.
Step 20: Lift the oven back into the cabinet.
Step 21: Return the four screws on the sides of the oven which hold it to the cabinet.
Step 22: Shut the door of the oven.
Step 23: Switch the oven’s circuit breaker back on.
If your Zanussi oven fan won’t turn off but the high limit thermostat isn’t faulty, the control board should be replaced. Below, we have listed the steps you need to follow in order to do this…
Step 1: Locate the oven’s circuit breaker.
Step 2: To avoid the risk of electrocution, switch off the oven’s circuit breaker.
Step 3: Open the door of your Zanussi oven.
Step 4: Get a Philips head screwdriver.
Step 5: Using the Philips head screwdriver, take out the screws which hold the oven to the cabinet. There should be four screws on each side.
Step 6: Lift the oven out of the cabinet.
Step 7: Set the oven on a sturdy surface.
Step 8: Get a Torx head screwdriver.
Step 9: Using the Torx head screwdriver, take out the screws which hold the oven’s top panel in place.
Step 10: Lift the top panel off and set it aside.
Step 11: Take out the screws which hold the control board to the oven’s front panel. If the panel isn’t held in place with screws, get a flat blade screwdriver.
Step 12: Using the flat blade screwdriver, bend back the tabs which hold the control board in place.
Step 13: Note where each wire goes on the control board. Do this by taking a picture.
Step 14: Disconnect the wires from the control board.
Step 15: Get a new control board for your Zanussi oven.
Step 16: Connect the wires to the new control board making sure that each wire goes to the right place.
Step 17: Position the control board on the control panel.
Step 18: If you took out any screws from the old control board, return them to hold the new board in place.
Step 19: Reposition the oven’s top panel.
Step 20: Hold the top panel in place with the screws.
Step 21: Lift the oven up and push it back into the cabinet.
Step 22: Return the four Philips head screws which hold the oven to the cabinet.
Step 23: Shut the oven door.
Step 24: Switch the oven’s circuit breaker back on.
Zanussi Fan Oven Not Heating — How To Fix
If your Zanussi fan oven is not heating, the heating element is most likely faulty. The heating element in a fan oven is located behind the oven interior’s back panel. If you take off this panel, you will see the element around the fan blade. If you would like a more detailed explanation of how to replace the element in your Zanussi fan oven, read this article: Zanussi Oven Element [How To, Issues & Solutions]