If you have an error code on your AEG oven but you have no idea why, you are in the right place. In this article, we will look at AEG oven error codes, what they mean, and how to fix them.
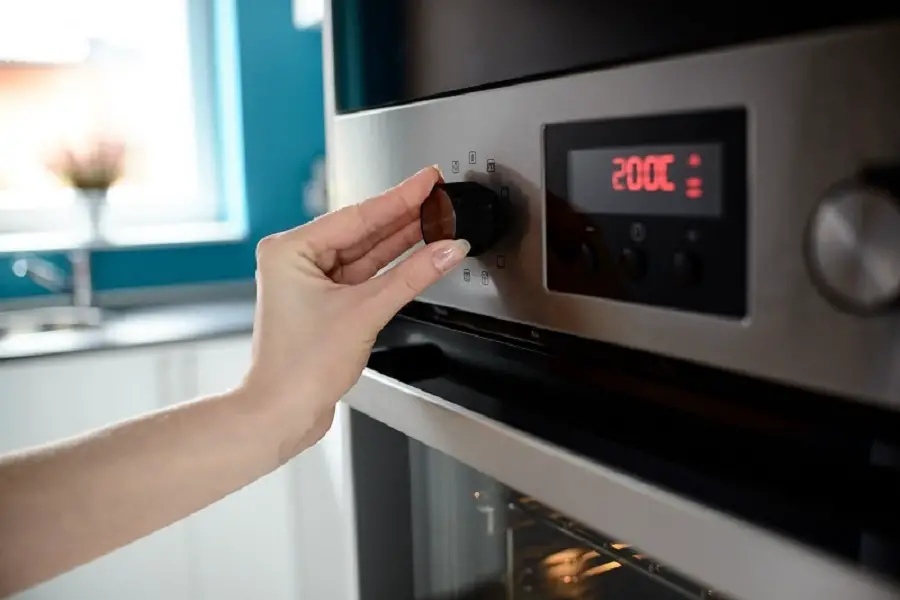
Table of Contents
AEG Oven Error Code F101 — How To Fix
If your AEG oven shows the error code F101, first reset it. Reset the oven by switching it off for 5 minutes. If you still see the error code after resetting the oven, the control board is faulty and should be replaced. Read this article: AEG Oven Light [Issues & Proven Solutions] to learn how to replace the control board in your AEG oven. Also read the article in the link to replace the control board if you see the AEG oven error code F8.
AEG Oven Error Code F102 — How To Fix
If you see this AEG oven error code, the door may be partially open. Shut the door completely and reset the oven. If your oven door won’t close properly, the door hinges or door seal could be faulty. Read this article: AEG Oven Door [How To, Issues & Proven Solutions] to replace these components. However, if you still see this error code after shutting the door and resetting the oven, the door lock assembly is faulty. Below, we have listed the steps you need to follow in order to replace the door lock assembly in your AEG oven…
Step 1: Locate the oven’s circuit breaker and switch it off to prevent the risk of electrocution.
Step 2: Open the oven door.
Step 3: Take out the Philips head screws on the sides of the oven’s front frame. These screws hold the oven to the cabinet.
Step 4: Lift the oven out of the cabinet and set it on a sturdy surface.
Step 5: If there are trim pieces on the sides of the oven’s front frame, take out the screws which hold them in place.
Step 6: Set the trim pieces aside.
Step 7: Take out the screws which hold the oven’s control panel in place.
Step 8: Lift the panel up and lower it down.
Step 9: Take a picture of the control board to note where each wire goes on it.
Step 10: Disconnect the wires from the control board.
Step 11: Set the control panel assembly aside.
Step 12: Take out the screws which hold the door lock assembly in place. Depending on your oven model, there will be two to four screws.
Step 13: Lift the door lock assembly.
Step 14: Note where each wire goes on the door lock assembly by taking a picture.
Step 15: Using a pair of needle nose pliers, disconnect the wires from the door lock assembly.
Step 16: Get a new door lock assembly and take it to the oven.
Step 17: Connect the wires to the door lock assembly making sure that each one goes to the right place.
Step 18: Position the assembly in the oven and hold it in place with the screws.
Step 19: Take the control panel assembly back to the oven.
Step 20: Connect the wires to the control board making sure that each one goes to the right place.
Step 21: Reposition the control panel assembly on the oven.
Step 22: Secure the panel using the screws.
Step 23: Return the side trim pieces of the oven’s front frame and hold it in place with the screws.
Step 24: Lift the oven back into the cabinet.
Step 25: Secure the sides of the oven to the cabinet using the Philips head screws.
Step 26: Shut the door and switch the oven’s circuit breaker.
Watch the video below for a visual of how to replace the door latch assembly in an oven.
Check out these articles…
Amana Oven Heating [Issues & Proven Solutions]
AEG Oven Grill [How To, Issues & Solutions]
AEG Oven Door [How To, Issues & Proven Solutions]
AEG Oven Fan [Issues & Proven Solutions]
AEG Oven Heating [Issues & Proven Solutions]
AEG Oven Error Code F105 — How To Fix
This AEG oven error code appears when the oven is overheating. This could be because of a faulty temperature sensor or thermostat. Follow the steps listed below to replace the temperature sensor in your AEG oven…
Step 1: Switch off the oven’s circuit breaker for safety.
Step 2: Open the oven door.
Step 3: There are screws on the sides of the oven which hold it to the cabinet. Take them out using a Philips head screwdriver.
Step 4: Lift the oven out of the cabinet and set on a sturdy surface.
Step 5: Take out the screws which hold the oven’s rear access panel in place.
Step 6: Disconnect the wire plug from the temperature sensor.
Step 7: Take out the screws which hold the sensor to the oven. Depending on your oven model, the screws will be right there on the rear, or on the oven interior’s back wall.
Step 8: Remove the sensor and get a replacement.
Step 9: Screw the new sensor to the oven.
Step 10: Connect the wire plug to the sensor.
Step 11: Reposition the oven’s rear panel and hold it in place with the screws.
Step 12: Lift the oven back into the cabinet and secure the sides using the Philips head screws.
Step 13: Shut the oven door.
Step 14: Switch the oven’s circuit breaker back on.
If you see the AEG oven error code F105 but your oven doesn’t use a temperature sensor, read this article: AEG Oven Heating [Issues & Proven Solutions] to replace the thermostat.
AEG Oven Error Code F130 — How To Fix
This AEG oven error code usually appears as the cause of a faulty cooling fan. If you have reset the oven, but you still see the error code, the cooling fan should be replaced. Follow these steps to replace this component in an AEG oven…
Step 1: Switch off the oven’s circuit breaker for safety.
Step 2: Open the oven door.
Step 3: Use a Philips head screwdriver to take out the screws which hold the oven to the cabinet.
Step 4: Lift the oven out of the cabinet and set on a sturdy surface.
Step 5: Unscrew the oven’s rear access panel and set it aside.
Step 6: Note where each wire goes on the cooling fan.
Step 7: Disconnect the wires from the cooling fan.
Step 8: Take out the screws which hold the cooling fan to the oven.
Step 9: Remove the cooling fan and get a new one.
Step 10: Position the new cooling fan in the oven and hold it in place with the screws.
Step 11: Reconnect the wires to the cooling fan making sure that each one goes to the right place.
Step 12: Return the oven’s access panel and the screws which hold it in place.
Step 13: Lift the oven back into the cabinet.
Step 14: Secure the sides of the oven to the cabinet with the Philips head screws.
Step 15: Shut the oven door.
Step 16: Switch the oven’s circuit breaker back on.
If you still see the AEG oven error code F130 after replacing the cooling fan, the control board is faulty. Read the “AEG Oven Light” article in the “AEG Oven Error Code F101” section above to replace the control board.
The video below will show you how to replace the cooling fan in an oven.
AEG Oven Error Code F241 — How To Fix
This AEG oven error code indicates a faulty selector switch. Follow the steps listed below to replace the selector switch in your AEG oven…
Step 1: Locate the circuit breaker for your oven.
Step 2: Switch the circuit breaker off to avoid the risk of electrocution.
Step 3: Open the door of the oven.
Step 4: There are Philips head screws on the sides of the oven which hold it to the cabinet. Take out the screws using a Philips head screwdriver.
Step 5: Lift the oven out of the cabinet and set on a sturdy surface.
Step 6: Using the Philips head screwdriver, take out the screws which hold the oven’s top panel in place.
Step 7: Set the top panel aside.
Step 8: The selector switch is behind one of the oven’s control knobs. Pull off the control knob with the selector switch behind it.
Step 9: Now, take out the two screws which hold the selector switch in place.
Step 10: Take a picture of the selector switch to note where each wire goes.
Step 11: Disconnect the wires from the selector switch using a pair of needle nose pliers.
Step 12: Get a new selector switch.
Step 13: Connect the wires to the selector switch. Make sure that each wire goes to the right place.
Step 14: Position the selector switch on the oven and hold it in place with the screws.
Step 15: Push the control knob back into place.
Step 16: Reposition the oven’s top panel and hold it in place with the screws.
Step 17: Lift the oven up and push it into the cabinet.
Step 18: Hold the oven to the cabinet using the Philips head screws.
Step 19: Shut the door.
Step 20: Switch the oven’s circuit breaker back on.
If you still see the AEG oven error code F241 after replacing the selector switch, the control board is faulty. Read the “AEG Oven Light” article in the “AEG Oven Error Code F101” section above.
AEG Oven Error Code Pyr — How To Fix
This isn’t an error code. It’s a message that appears on the oven’s display to remind you to clean your oven. To get rid of the error code temporarily, press the “+” and “-” buttons at the same time. Note that this will just get rid of the message for a while. To fully get rid of the message, you will need to run the self clean cycle. If you don’t know how to use the self clean feature in your AEG oven, read this article: How To Clean An AEG Oven [Detailed Guide]