If your Kenmore oven door won’t close all the way or you want to learn how to put your Kenmore oven door back on, this article is for you. We will show you how to fix any problems you may have with your Kenmore oven door today.
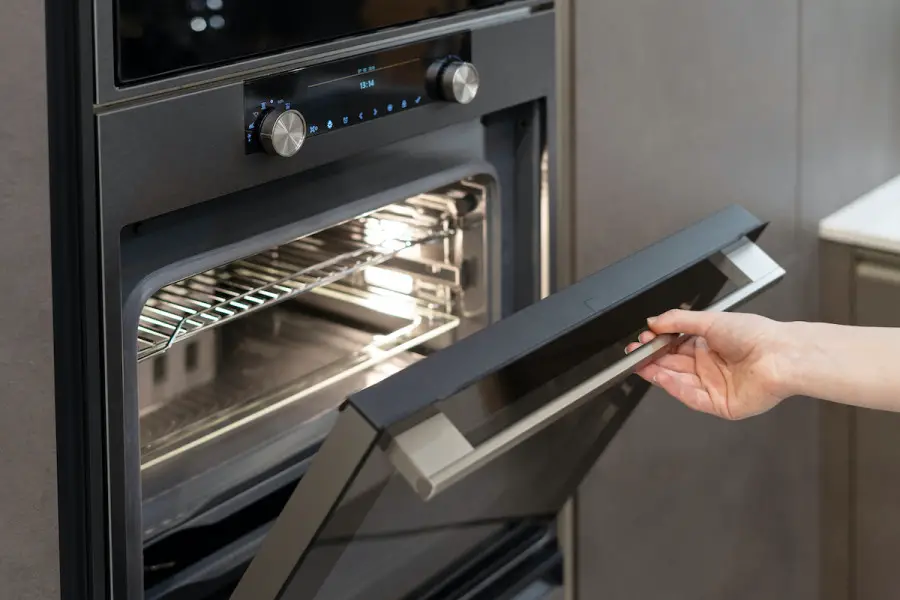
Table of Contents
How To Remove Kenmore Oven Door
Below, we have listed the steps you need to follow in order to remove your Kenmore oven door…
Step 1: Pull the oven away from the wall and unplug the power cord.
Step 2: Open the oven door and get a flat head screwdriver.
Step 3: Using the flat head screwdriver, flip the lock on each door hinge towards yourself.
Step 4: Close the door till it stops.
Step 5: Grip the sides of the oven door.
Step 6: Lift the door up, tilt it in, and remove it.
How To Put Kenmore Oven Door Back On
To put your Kenmore oven door back on, simply follow the steps listed below…
Step 1: Lift the oven door.
Step 2: Insert the door hinges into the slots in the sides of the oven frame.
Step 3: Open the oven door completely.
Step 4: Flip the lock on each door hinge back to hold it in place.
Step 5: Shut the oven door.
Kenmore Oven Door Won’t Close All The Way — Causes And Solutions
Below, we have listed the possible reasons why your Kenmore oven door won’t close completely and what to do about them.
1. Door Hinges
If the springs on the oven door hinges start to loosen, the oven door won’t close completely. Below, we have listed the steps you need to follow in order to replace your Kenmore oven door hinges…
Step 1: Pull the oven away from the wall.
Step 2: Unplug the oven’s power cord from the outlet.
Step 3: Open the door of your Kenmore oven.
Step 4: Use a flat blade screwdriver to flip the lock on each door hinge forward.
Step 5: Close the door till it can’t go any further.
Step 6: Lift the door off and set it on a cloth lined surface
Step 7: Using a Philips head screwdriver, take out the two screws which hold the oven door handle in place.
Step 8: Set the handle aside and take out the screws at the top of the door which hold the bracket in place.
Step 9: Take out the screws on the sides and bottom of the door which hold the two door assemblies in place.
Step 10: Lift the inner door assembly off the outer one.
Step 11: Now, take out the screws which hold the hinges to the oven door.
Step 12: Remove the door hinges.
Step 13: Get new door hinges and position them on the oven door.
Step 14: Secure the hinges with the screws.
Step 15: Place the inner door assembly back on the outer door assembly.
Step 16: Return the screws at the sides and bottom of the door which hold the two assemblies in place.
Step 17: Reposition the top bracket and hold it in place with the screws.
Step 18: Position the handle on the oven door and secure it with the two Philips head screws.
Step 19: Lift the oven door and insert the hinges into the slots in the sides of the oven.
Step 20: Open the oven door completely.
Step 21: Flip the hinge locks back and shut the door.
Step 22: Plug the oven’s power cord in and return the oven to its usual position.
Watch the video below for a visual of how to replace your Kenmore oven door hinges.
2. Door Gasket
If replacing the door hinges doesn’t fix the problem, the gasket should be replaced. Below, we have listed the steps to follow in order to replace your Kenmore oven door gasket…
Step 1: Pull the oven away from the wall.
Step 2: Unplug the oven’s power cord from the outlet.
Step 3: Open the door of the oven.
Step 4: Pull out the ends of the door gasket from the holes in the bottom of the oven.
Step 5: Pull out the gasket clips from the holes around the oven door.
Step 6: Get a new door gasket.
Step 7: Insert the clips on the new gasket into the holes around the oven door.
Step 8: Push the ends of the gasket into the two holes using a flat head screwdriver.
Step 9: Shut the oven door.
Step 10: Plug the oven’s power cord back in.
Watch the video below for a visual of how to replace your Kenmore oven door gasket.
Kenmore Oven Door Handle Loose — How To Fix
If your Kenmore oven door handle is loose, follow the steps listed below to tighten it…
Step 1: Turn the oven off.
Step 2: Unplug the oven’s power cord from the outlet.
Step 3: Open the oven door and get a Philips head screwdriver.
Step 4: Using the screwdriver, tighten the two screws on the upper corners of the oven door which hold the door handle in place.
Step 5: Shut the oven door.
Step 6: Plug the oven’s power cord back in.
If that doesn’t work, the door handle may be broken. Read the section directly below this one to learn how to replace your Kenmore oven door handle.
How To Replace Kenmore Oven Door Handle
Below, we have listed the steps you need to follow in order to replace your Kenmore oven door handle…
Step 1: Unplug the oven’s power cord from the outlet. You may need to pull the oven away from the wall to do this.
Step 2: Open the door of the oven.
Step 3: Get a clamp and position it on the top of the oven door. This is to prevent the outer glass from falling when you take out the door handle screws.
Step 4: Using a Philips head screwdriver, take out the two screws on the upper corners of the oven door which hold the handle in place.
Step 5: Get a new door handle.
Step 6: Position the handle on the oven door and hold it in place with the Philips head screws.
Step 7: Remove the clamp and shut the oven door.
Step 8: Plug the oven’s power cord back in.
Watch the video below for a visual of how to replace a Kenmore oven door handle.
Check out these articles…
Kenmore Oven Element [Problems & Proven Solutions]
How To Clean A Kenmore Oven [Detailed Guide]
Kenmore Oven Lock [Problems & Proven Solutions]
Kenmore Oven Broiler [How To, Issues & Solutions]
Kenmore Oven Fan [Issues & Proven Solutions]
Kenmore Oven Door Glass Shattered — What To Do
If your Kenmore oven door glass is shattered, you will need to replace it. We will show you how to replace the inner and outer glass of your Kenmore oven door.
Outer Glass
Below, we show you how to replace the outer glass of your Kenmore oven door…
Step 1: Disconnect the oven’s power cord from the outlet.
Step 2: Open the oven door.
Step 3: Flip the lock on each door hinge forward using a flat blade screwdriver.
Step 4: Close the door till it can’t go any further.
Step 5: Lift the door off and set on a cloth lined surface. Do not lift the door off by the handle.
Step 6: Take out the two Philips head screws which hold the door handle in place.
Step 7: Take out the screws which hold the door’s top cap in place.
Step 8: Set the top cap aside.
Step 9: Take out the screws on the sides and bottom of the door which hold the inner door to the remains of the outer door. To prevent injury, put on some gloves as you do this.
Step 10: Lift the inner door off and set it aside.
Step 11: Discard the remains of the door glass.
Step 12: Get a new outer glass for your Kenmore oven door.
Step 13: Position the inner door assembly on the outer door.
Step 14: Return the screws which hold the inner door assembly to the outer door glass.
Step 15: Reposition the door’s top cap and secure with the screws.
Step 16: Return the handle and the screws which hold it in place.
Step 17: Lift the oven door and insert the hinges into the slots in the sides of the oven.
Step 18: Open the door fully.
Step 19: Flip the hinge locks back and shut the oven door.
Step 20: Plug the oven’s power cord back in.
Watch the video below for a visual of how to replace the outer glass of your Kenmore oven door.
Inner Glass
Below, we have listed the steps you need to follow in order to replace the inner glass of your Kenmore oven door…
Step 1: Unplug the oven’s power cord.
Step 2: Open the door of the oven.
Step 3: Using a flat blade screwdriver, flip the locks on the door hinges towards yourself.
Step 4: Push the door closed till it stops.
Step 5: Grip the sides of the door and lift it off.
Step 6: Set the door on a cloth lined surface.
Step 7: Take out the screws which hold the outer glass to the inner door assembly. There are screws at the bottom. There may also be screws on the sides.
Step 8: Now, take out the two screws which hold the door handle in place.
Step 9: Remove the door handle and take out the screws which hold the door’s top cap in place.
Step 10: Set the top cap aside and take out the screws holding the two door hinges.
Step 11: Remove the door hinges.
Step 12: Flip the door over.
Step 13: Take out the screws which hold the inner glass metal panel in place.
Step 14: Lift the metal panel.
Step 15: With gloves on, remove all the pieces of broken glass.
Step 16: Get a new inner door glass and position it in the door assembly.
Step 17: Reposition the metal panel and hold it in place with the screws.
Step 18: Flip the door over and reposition the door hinges.
Step 19: Hold the door hinges in place with the screws.
Step 20: Return the top cap and the screws which hold it in place.
Step 21: Screw the handle back to the oven door.
Step 22: Slide the outer glass back onto the inner door assembly and hold it in place with the screws.
Step 23: Lift the door assembly and insert the hinges into the slots in the sides of the oven frame.
Step 24: Open the oven door fully.
Step 25: Flip the hinge locks back to hold the door in place.
Step 26: Shut the door and plug the oven’s power cord back in.
Watch the video below for a visual of how to replace the inner glass of your Kenmore oven door.
Kenmore Oven Door Won’t Go Back On — How To Fix
If your Kenmore oven door won’t go back on, you will need to reset the hinges. Follow the steps listed below to reset the hinges of your Kenmore oven door…
Step 1: Get a large wrench.
Step 2: Using the wrench, pull one door hinge down.
Step 3: While holding the door hinge down, flip the clip on it back. This will hold the door hinge in place.
Step 4: Do the same with the other door hinge.
Also follow the steps above to reset your oven hinges if your Kenmore oven door hinge is stuck or your Kenmore oven door hinge is sprung.
Watch the video below for a visual of how to reset your Kenmore oven door hinge.
Kenmore Oven Door Says Locked But It Isn’t — How To Fix
If your Kenmore oven keeps showing “Loc” or “Door Locked” even though the oven door isn’t actually locked, it may have been interrupted during the self clean cycle. If this happens, reset the oven. Read this article: How To Reset A Kenmore Oven [Detailed Guide] if you don’t know how to reset your Kenmore oven.
Kenmore Oven Door Disassembly
Below, we show you how to disassemble your Kenmore oven door…
Step 1: Unplug the oven’s power cord for safety.
Step 2: Open the oven door.
Step 3: Flip the locks on the door hinges forward to release the oven door.
Step 4: Close the door till it can’t go any further, then lift it off.
Step 5: Set the door on a cloth lined surface.
Step 6: Take out the two screws which hold the door handle in place. Do this with a Philips head screwdriver.
Step 7: Remove the top cap as well by taking out the screws which hold it in place.
Step 8: Now, take out the screws at the bottom of the door which hold the two door assemblies in place.
Step 9: Lift the inner door off the outer glass.
Step 10: Take out the screws which hold the inner door glass’s metal panel cover.
Step 11: Lift the cover and set it aside.
To reassemble your Kenmore oven door, follow the steps listed below…
Step 1: Reposition the metal panel on the inner door assembly and secure it with the screws.
Step 2: Lift the inner door and position it on the outer glass.
Step 3: Return the screws at the bottom of the oven door which hold it in place.
Step 4: Reposition the oven’s top cap and hold it in place with the screws
Step 5: Return the door handle and the screws which secure it.
Step 6: Lift the oven door and position the hinges in the slots on the sides of the oven frame.
Step 7: Open the oven door fully.
Step 8: Flip the locks on the hinges back to hold the door in place.
Step 9: Shut the door.
Step 10: Plug the oven’s power cord back in.
Watch the video below if you would like a visual of how to disassemble your Kenmore oven door.
Kenmore Glass Stove Top Cracked — What To Do
If your Kenmore glass stove top is cracked or broken, you will need to replace it. Below, we have listed the steps you need to follow in order to replace your Kenmore glass stove top…
Step 1: Pull the stove away from the wall.
Step 2: Unplug the power cord from the outlet to avoid the risk of electrocution.
Step 3: Pull off the control knobs.
Step 4: Remove the four control panel retainers using a flat head screwdriver.
Step 5: Lift the control panel assembly and disconnect the wire plugs from it.
Step 6: Set the panel aside and take out the screws which hold the metal plate in place using a Philips head screwdriver.
Step 7: Unscrew the green grounding wire from the metal plate.
Step 8: Lift the metal plate and disconnect the wire plugs from it.
Step 9: Open the door of the oven.
Step 10: Take out the screws which hold the control panel’s plastic cover in place. There are screws at the top and bottom.
Step 11: Lift the plastic cover off.
Step 12: Peel off the gasket from the front of the glass stove top.
Step 13: Take out the Philips head screws which hold the stove top in place.
Step 14: Note how each wire harness is positioned, then lift the glass stove top.
Step 15: Set the glass stove top face down on a towel lined sturdy surface.
Step 16: Pull out the indicator light if your stove top has one.
Step 17: Using a flat head screwdriver, remove the brackets from all the stove top elements.
Step 18: Note how each element is positioned on the stove top. For instance, where the numbers on the element should be facing. You can take a picture to make this easier.
Step 19: Remove the elements.
Step 20: Remove the screws which hold the metal frame to the glass stove top.
Step 21: Lift the frame off and set it aside.
Step 22: Get a new glass stove top.
Step 23: Position the metal frame on the stove top and hold it in place with the screws.
Step 24: Bend up the bracket tabs on the stove top.
Step 25: Place the elements on the stove top making sure they are positioned in the right way.
Step 26: Return the retaining brackets which hold the elements in place.
Step 27: If you removed the indicator light, position it back in the stove top.
Step 28: Lift the stove top and place it back on the oven.
Step 29: Secure the stove top with the screws.
Step 30: Return the stove top gasket.
Step 31: Reposition the control panel’s plastic cover and hold it in place with the screws.
Step 32: Take the metal plate back to the oven and reconnect the wire harnesses.
Step 33: Secure the metal plate to the oven with the screws.
Step 34: Screw the grounding wire back to the metal plate.
Step 35: Take the control panel assembly back to the stove and connect the wires to it.
Step 36: Position the control panel on the stove and secure it with the retainers.
Step 37: Push the control knobs back in.
Step 38: Shut the oven door.
Step 39: Plug the oven’s power cord back in.
Step 40: Return the oven to its usual position.
Watch the video below for a visual of how to replace your Kenmore glass stove top.
Kenmore Microwave Oven Runs With Door Open — How To Fix
If your Kenmore microwave oven runs with the door open, the door switch is faulty. Below, we have listed the steps you need to follow in order to replace the door switch in your Kenmore microwave oven…
Step 1: Unplug the microwave’s power cord from the outlet to avoid the risk of electrocution.
Step 2: Open the door of the microwave.
Step 3: Using a Philips head screwdriver, take out the screws at the top of the microwave which hold the front vent in place.
Step 4: Lift the front vent off and set it aside.
Step 5: Take out the screw on the left side of the control panel assembly which secures it.
Step 6: Loosen the other screw behind the control panel.
Step 7: Lift the panel up to detach then lower it down.
Step 8: Take out the screws on the oven frame which hold the door switch assembly in place.
Step 9: Press the small button on the top door switch. If there is a strong click, the switch is still good. However, if the button feels loose when you press it, it’s faulty.
Step 10: Do this same test with the other two door switches.
Step 11: Depress the tab which secures the faulty door switch.
Step 12: Remove the switch from the holder and disconnect the wire plug.
Step 13: Get a new door switch.
Step 14: Connect the wire plug to the new door switch.
Step 15: Position the switch in the holder and snap it into place.
Step 16: Reposition the holder on the microwave frame and hold it in place with the screws.
Step 17: Lift the control panel assembly and position it on the microwave.
Step 18: Tighten the screw behind the control panel.
Step 19: Return the screw on the left side of the control panel to hold it in place.
Step 20: Reposition the oven’s front vent and hold it in place with the Philips head screws.
Step 21: Shut the door of the microwave.
Step 22: Plug the microwave’s power cord back in.
Watch the video below for a visual of how to replace the door switch in a Kenmore microwave.