Is your Kitchenaid oven door not closing completely? In this article, we will show you how to fix this problem and other Kitchenaid oven door problems.
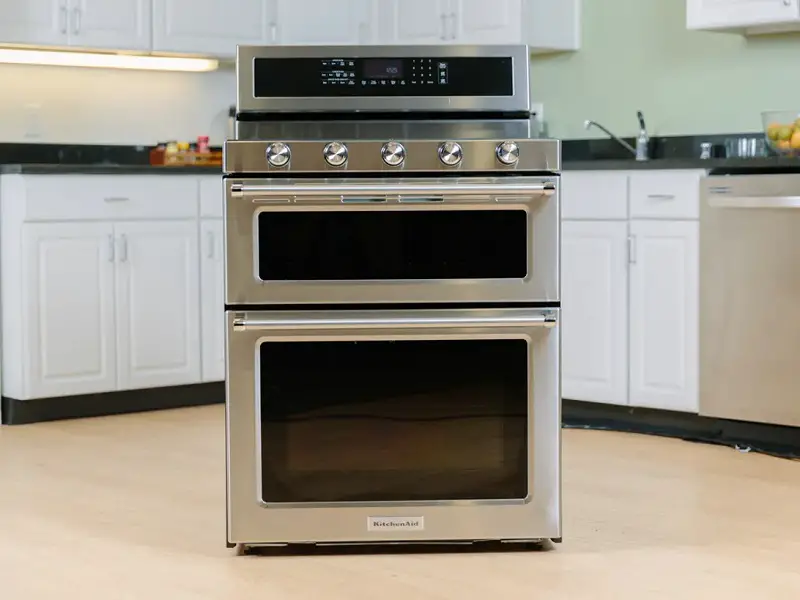
Table of Contents
Kitchenaid Oven Door Not Closing All The Way — How To Fix
If your Kitchenaid oven door is not closing completely, the door seal or door hinges are faulty. We will show you how to replace these two components below.
1. Door Gasket
Follow the steps listed below to replace your Kitchenaid oven door gasket…
Step 1: Switch off your circuit breaker or unplug the power cord to avoid the risk of electrocution.
Step 2: Open the door of the oven.
Step 3: The gasket is around the front frame of the oven. Pull each corner of the gasket to release the clips from the oven.
Step 4: Get a new door gasket.
Step 5: Push each clip on the gasket into the holes in the oven frame.
Step 6: Close the door of the oven.
Step 7: Plug the oven back in or switch on the circuit breaker.
The video below will give you a visual of how to replace a Kitchenaid oven door gasket.
2. Door Hinges
If your Kitchenaid oven door still doesn’t close properly after replacing the door seal, the door hinges should be replaced. Below, we show you how to replace the door hinges in a Kitchenaid range oven and a Kitchenaid double wall oven. To replace the door hinges of a Kitchenaid range oven, follow the steps listed below…
Step 1: Pull the oven away from the wall and unplug the power cord.
Step 2: Open the door of the oven.
Step 3: Flip the locks on the door hinges down.
Step 4: Close the door partially.
Step 5: Grip the sides of the door.
Step 6: Lift the door off.
Step 7: Using a Philips head screwdriver, take out the three screws at the bottom of the oven door.
Step 8: Take out the two screws on the top corners of the door.
Step 9: Lift the inner door off the outer one.
Step 10: Take out the four screws which hold the two door hinges to the inner door.
Step 11: Remove the door hinges.
Step 12: Get new door hinges.
Step 13: Position the new hinges on the door and secure with the screws.
Step 14: Lift the inner door and place it back on the outer one.
Step 15: Return the screws at the top and bottom which secure the oven door.
Step 16: Lift the door.
Step 17: Position the door hinges into the slots on the sides of the oven door.
Step 18: Open the door fully.
Step 19: Push the hinge locks back.
Step 20: Shut the door and plug the oven back in.
Watch the video below for a visual of how to replace the door hinges of a Kitchenaid range oven.
Below are the steps you need to follow in order to replace the door hinges of a Kitchenaid double wall oven…
Step 1: Locate the oven’s circuit breaker and switch it off.
Step 2: Open the door of the upper or lower oven depending on which door hinges you want to replace.
Step 3: There is a lock on each door hinge. Push the locks down to release the door.
Step 4: Close the door till it can’t go any further.
Step 5: Grip the sides of the oven door and lift it of.
Step 6: Place the door on a cloth lined surface.
Step 7: Using a Philips head screwdriver, take out the four screws which hold the inner door assembly to the outer door assembly.
Step 8: Lift the inner door assembly off.
Step 9: Take out the four screws which hold the door hinges to the inner door.
Step 10: Pull out the hinges.
Step 11: Get new door hinges.
Step 12: Slide the new hinges into the door and secure with the four screws.
Step 13: Place the inner door assembly back on the outer door assembly.
Step 14: Secure with the four screws.
Step 15: Lift the door.
Step 16: Insert the door hinges back into the oven slots.
Step 17: Open the door and push the hinge locks back.
Step 18: Shut the door and switch the circuit breaker back on.
Watch the video below if you would like a visual of how to replace the door hinges of a Kitchenaid double wall oven.
Check out these articles…
Frigidaire Oven Smells [How To Fix]
Kitchenaid Oven Self Clean [How To, Issues & Solutions]
How To Clean A Kitchenaid Oven [Detailed Guide]
How To Use A Kitchenaid Oven [Detailed Guide]
Kitchenaid Oven Preheating [How To, Issues & Solutions]
How To Remove A Kitchenaid Oven Door
To remove a Kitchenaid oven door, follow these steps…
Step 1: Unplug your oven’s power cord or switch of the circuit breaker.
Step 2: Open the oven door.
Step 3: There is a lock on each door hinge. Push each lock down to release the door.
Step 4: Grip the sides of the door and lift it off.
How To Put Kitchenaid Oven Door Back On
Follow the steps listed below to put your Kitchenaid oven door back on…
Step 1: Lift the door.
Step 2: Position each door hinge into the slots in the oven frame. There is one slot on each lower corner of the oven.
Step 3: Open the door completely.
Step 4: There is a lock on each door hinge. Push the locks backwards to secure the door.
Step 5: Close the door.
Kitchenaid Oven Door Won’t Go Back On — How To Fix
Follow the steps listed below if your Kitchenaid oven door won’t go back on…
Step 1: Get a large wrench.
Step 2: Using the wrench, pull one door hinge down.
Step 3: While holding the door hinge down, push the locking tab on it back down.
Step 4: Do the same with the other door hinge.
Also follow the steps above if your Kitchenaid oven door is stuck.
The video below will show you what to do if your oven door won’t go back on.
Kitchenaid Oven Door Locked — How To Fix
If your Kitchenaid oven door is locked or if your Kitchenaid door latch is stuck, read this article: Kitchenaid Oven Lock [How To, Issues & Solutions]. It will walk you through everything you need to do to fix this situation. This article also contains detailed explanations and steps on other problems and challenges that you might encounter with your Kitchenaid oven door lock.
Kitchenaid Oven Door Handle Loose — How To Fix
If your Kitchenaid oven door handle is loose, follow the steps below to tighten the door handle of your Kitchenaid oven…
Step 1: Turn off the oven and switch off the circuit breaker.
Step 2: Open the oven door and flip the locks on the door hinges down.
Step 3: Close the door partially then lift it off. Do not hold the door by the handle when doing this.
Step 4: Place the door on a towel lined surface.
Step 5: Take out the screws which hold the inner door to the outer one. On some Kitchenaid oven models, there are four Philips head screws on the edges of the door. On other models, there are two Philips head screws at the top corners and three at the bottom.
Step 6: Lift the inner door off the outer one.
Step 7: Tighten the two screws which hold the door handle.
Step 8: Return the inner door.
Step 9: Secure the door with the screws.
Step 10: Position the door hinges into the slots on the sides of the oven.
Step 11: Open the door and push back the hinge locks.
Step 12: Switch the circuit breaker back on.
How To Fix A Kitchenaid Oven Door Handle
If there is a problem with your Kitchenaid oven door handle, you should replace it. Below are the steps you need to follow in order to replace the door handle of your Kitchenaid oven…
Step 1: Unplug the oven’s power cord or switch off the circuit breaker to avoid the risk of electrocution.
Step 2: Open the oven door.
Step 3: Flip the locks on the door hinges down.
Step 4: Close the door till it stops.
Step 5: Lift the door off and set on a towel lined surface.
Step 6: Using a Philips head screwdriver, take out the screws which hold the inner door assembly to the outer one. On some models, there will be four screws on the sides of the door. On other models, there will be three screws at the bottom and two on the upper corners.
Step 7: Set the inner door assembly aside.
Step 8: Take out the two screws which hold the door handle in place.
Step 9: Remove the door handle and get a new one.
Step 10: Screw the new door handle into place.
Step 11: Return the inner door to the outer door.
Step 12: Secure them with the screws.
Step 13: Lift the door and insert the hinges back into the slots on the sides of the oven frame.
Step 14: Open the door fully.
Step 15: Flip the hinge locks back.
Step 16: Shut the door and reconnect the power to the oven.
Watch the video below for a visual of how to replace a Kitchenaid oven door handle.
Kitchenaid Oven Door Won’t Open After Self Clean — What To Do
Read this article to know why your Kitchenaid oven door won’t open after self cleaning and what to do about it.
Kitchenaid Oven Door Shattered — What To Do
If your Kitchenaid oven door glass is shattered, you will need to replace it. Below we show you how to replace the outer door glass and the inner door glass of your Kitchenaid oven…
1. Outer Door Glass
Follow the steps below to replace the outer glass assembly of your Kitchenaid oven door.
Step 1: Switch off the oven’s circuit breaker.
Step 2: Open the oven door.
Step 3: Flip the hinge locks down.
Step 4: Close the door till it can’t go any further.
Step 5: Lift the door off and place on a cloth lined surface.
Step 6: Take out the screws which hold the inner door to the outer one. There should be about four screws.
Step 7: Lift the inner door and set it aside.
Step 8: Lift off the window pack from the outer door.
Step 9: Take out the four screws which hold the door hinges to the outer door.
Step 10: Remove the door hinges and set them aside.
Step 11: Take out the screws which hold the two metal brackets on the upper corners of the outer door.
Step 12: Take out the screws which secure the door handle.
Step 13: Get a new outer door glass assembly.
Step 14: Remove the window pack clips and side rails from the old glass.
Step 15: Position the side rails and window pack clips on the new outer door glass. Ensure the rails’ two holes are facing the door of the glass.
Step 16: Return the door handle and the two screws which hold it in place.
Step 17: Slide the door hinges back and secure with the four screws.
Step 18: Return the side brackets and the screws which secure them.
Step 19: Place the window pack on the outer door making sure that the up marked area is faced up.
Step 20: Return the inner door and secure with the screws.
Step 21: Insert the door hinges back into the slots on the sides of the oven.
Step 22: Open the door and push the hinge locks back.
Step 23: Shut the door.
Step 24: Switch the circuit breaker back on.
The video below will show you how to replace a Kitchenaid oven door outer door glass.
2. Inner Glass
To replace the inner glass of your Kitchenaid oven door, follow the steps listed below…
Step 1: Switch off the circuit breaker or unplug the oven’s power cord.
Step 2: Open the oven door.
Step 3: Flip the lock on each door hinge down.
Step 4: Close the door till it stops.
Step 5: Grip the sides of the door and lift it off.
Step 6: Set the door on a sturdy surface lined with a cloth.
Step 7: Take out the screws which hold the inner door assembly to the outer door assembly. Depending on your oven model, there will be four screws at the sides or three screws at the bottom and two at the top.
Step 8: Lift off the inner door assembly and set it aside.
Step 9: Using a quarter inch nut driver, take out the screws on the inner door assembly which hold the glass retaining bracket in place.
Step 10: Remove the bracket.
Step 11: Lift out the inner glass or the remains of the glass.
Step 12: Get a new inner glass.
Step 13: Position the glass on the inner door assembly.
Step 14: Return the metal retaining bracket and the two screws which secure it.
Step 15: Reposition the inner door on the outer one.
Step 16: Secure the door with the screws.
Step 17: Lift the door.
Step 18: Insert the door hinges into the slots on the sides of the oven.
Step 19: Open the door and push the hinge locks back.
Step 20: Shut the door and reconnect the power to the oven.
If your Kitchenaid oven door glass is cracked, also follow the steps above to replace it in order to avoid any complications later on.
If you would like a visual of how to replace a Kitchenaid oven inner door glass, watch the video below.
How To Clean A Kitchenaid Oven Door Glass
To clean your Kitchenaid oven door glass, follow the steps listed below…
Step 1: Get a small bowl.
Step 2: Pour some baking soda into the bowl.
Step 3: Slowly add water to the baking soda to form a thick paste.
Step 4: Apply the paste to the door glass and let it sit for 30 minutes.
Step 5: After 30 minutes, spray some vinegar on the door glass.
Step 6: Carefully scrub the glass with a soft non abrasive sponge.
Step 7: Wipe the glass with paper towels.
Step 8: Mix three parts water with one part vinegar.
Step 9: Spray the mixture on the glass to rinse.
Step 10: Wipe the glass with a micro fiber cloth.
Kitchenaid Oven Close Door Message
If your Kitchenaid oven shows this message, the door isn’t closed properly. Strongly open and close the door a few times. Make sure you don’t slam the door. Turn the oven off then turn it on again. The message should have cleared.
