If your Whirlpool oven drawer is stuck or you would like to learn how to use it, this article is for you. We will show you how to use a Whirlpool oven drawer and fix any problems you may have with it.
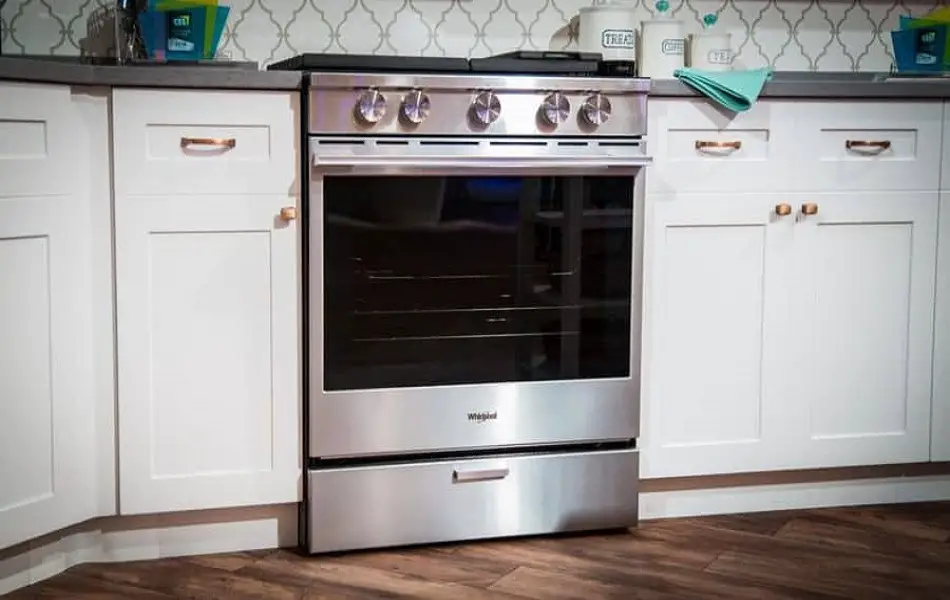
Table of Contents
How To Use Whirlpool Oven Warming Drawer
Below, we show you how to use the warming drawer of your Whirlpool oven…
Step 1: Turn the oven on.
Step 2: Push and turn the warming drawer control knob to select low, medium low, medium, medium high, or high. If your oven doesn’t have a warming drawer control knob, simply press the “Warming Drawer” button till you reach your desired setting.
Step 3: Select the Moist or Dry setting.
Step 4: Press “Start”.
Step 5: Leave the warming drawer to preheat for a while. If you set the drawer to low, preheat for 5 minutes. For medium, 10 minutes, and for high, 20 minutes.
Step 6: Once the drawer is preheated, pull it out and place your food inside.
Step 7: Once you are done using the drawer, press the “Cancel/Off” button or turn the control knob to the off position.
Whirlpool Oven Drawer Stuck — How To Fix
If your Whirlpool oven drawer is stuck, it’s probably because something placed inside was jammed in it. To prevent this from happening all the time, it’s best not to leave any utensils or other things in the drawer. If your Whirlpool oven bottom drawer is stuck, simply follow the steps listed below to fix it…
Step 1: First, unplug the oven from the outlet for safety.
Step 2: Grip the handle of the drawer.
Step 3: Wiggle the drawer from side to side to loosen up anything that could be jamming the drawer. Make sure to put some muscle into it.
Step 4: If that doesn’t work, get a wooden spoon. The spoon should be thin enough to enter the drawer.
Step 5: Insert the spoon into the slot between the oven and drawer.
Step 6: Use the spoon to push back whatever may be jamming the drawer.
The video below will show you what to do if your Whirlpool oven drawer is stuck.
Whirlpool Oven Drawer Off Track — How To Fix
If the drawer of your Whirlpool oven is off the track, follow the steps listed below…
Step 1: Turn the oven off and unplug the power cord.
Step 2: Tightly grip the handle of the bottom drawer.
Step 3: Strongly wiggle the drawer up and down while pulling it forward. This should release the drawer.
Step 4: Once the drawer is out, position the sides on the rails making sure that they are aligned.
Step 5: Slide the drawer back in.
Whirlpool Oven Drawer Won’t Close Completely — How To Fix
If the bottom drawer of your Whirlpool oven won’t close completely, the drawer glide is faulty. Follow the steps listed below to replace the glide of your Whirlpool oven bottom drawer…
Step 1: Pull the oven away from the wall and unplug the power cord from the outlet.
Step 2: Pull the drawer forward.
Step 3: Take out the rack or racks in the drawer and set aside.
Step 4: Lift the drawer up and pull it out.
Step 5: Set the drawer aside.
Step 6: Using a flat head screwdriver, bend back the clips on the drawer glides which secure them to the drawer.
Step 7: Get new drawer glides.
Step 8: Position the glides on the bottom of the drawer and push them into place.
Step 9: Using a Philips head screwdriver, take out the screws which hold the front drawer glides to the bottom sides of the oven.
Step 10: Using a pair of pliers, squeeze the clips which secure the glides to the oven in order to remove them.
Step 11: Position the new front drawer glides on the frame of the oven and snap them into place.
Step 12: Return the screws which hold the glides in place.
Step 13: Reposition the bottom drawer.
Step 14: Return the rack or racks to the drawer.
Step 15: Slide the drawer back in.
Step 16: Plug the oven’s power cord back into the outlet.
Watch the video below for a visual of how to replace your Whirlpool oven drawer glide.
Check out these articles…
Whirlpool Oven Is Not Working [How To Fix]
Whirlpool Oven Clock/Timer [Issues & Proven Solutions]
Whirlpool Oven Preheat [How To, Issues & Proven Solutions]
Whirlpool Oven Won’t Turn On/Off [Proven Solutions]
Kenmore Oven Element [Problems & Proven Solutions]
How To Replace Whirlpool Oven Drawer Sensor
If the bottom warming drawer of your Whirlpool oven is not reaching the set temperature, the sensor is faulty. Replacing the temperature sensor of your Whirlpool oven can be a bit complicated. So, if you aren’t experienced with ovens, it would be best to get a technician to replace it for you. However, if you want to replace the sensor of your Whirlpool oven warming drawer yourself, read this article: Whirlpool Oven Temperature [Problems & Proven Solutions]
How To Replace Whirlpool Oven Drawer Handle
Below, we have listed the steps you need to follow in order to replace the handle of your Whirlpool oven drawer…
Step 1: Pull the oven away from the wall.
Step 2: To avoid the risk of electrocution, disconnect the oven’s power cord from the outlet.
Step 3: Pull the oven’s bottom drawer forward.
Step 4: Remove the rack and any other accessories in the drawer.
Step 5: Using a pair of pliers, bend back the rails on the sides of the bottom drawer to remove it.
Step 6: Lift the drawer up and set on a surface lined with a cloth. Place the drawer upside down.
Step 7: Using a Philips head screwdriver, take out the screws on the front panel of the drawer.
Step 8: Flip the drawer over and take out the other screws which hold the drawer’s front panel in place.
Step 9: Lift the drawer off the front panel and set it aside.
Step 10: Remove the insulation and metal panel from the front panel.
Step 11: Now, take out the two screws which hold the drawer handle to the front panel.
Step 12: Remove the handle and get a new one.
Step 13: Position the new handle on the panel and secure it with the screws.
Step 14: Place the metal panel and insulation back on the front panel.
Step 15: Reposition the drawer on the front panel assembly.
Step 16: Return the screws at the top and bottom of the panel which secure the drawer to it.
Step 17: Lift the drawer and position it on the side rails.
Step 18: Snap the drawer into place by pushing it down.
Step 19: Return the racks and any other accessories to the drawer.
Step 20: Slide the drawer back in.
Step 21: Plug the oven’s power cord back in.
Step 22: Push the oven’s drawer back in.
Watch the video below for a visual of how to replace the handle of your Whirlpool oven drawer.
How To Remove A Whirlpool Oven Drawer
To remove the drawer of your Whirlpool oven, follow the steps listed below…
Step 1: Pull the drawer forward.
Step 2: Lift out the rack in the drawer and take out any other accessories in it.
Step 3: Get a pair of pliers.
Step 4: Using the pair of pliers, bend back the side rails of the bottom drawer to release it.
Step 5: Lift the drawer off.
How To Put Whirlpool Oven Drawer Back on
To put your Whirlpool oven bottom drawer back on, follow the steps listed below…
Step 1: Lift the drawer.
Step 2: Pull out the side rails and position the drawer on them.
Step 3: Push the drawer down to secure it. You should hear it snap into place.
Step 4: If you removed the rack from the drawer, return it.
Step 5: Slide the drawer back in.