Is your Whirlpool oven heating slowly or not at all? If so, this article is for you. We will talk about Whirlpool oven heating problems and how to fix them.
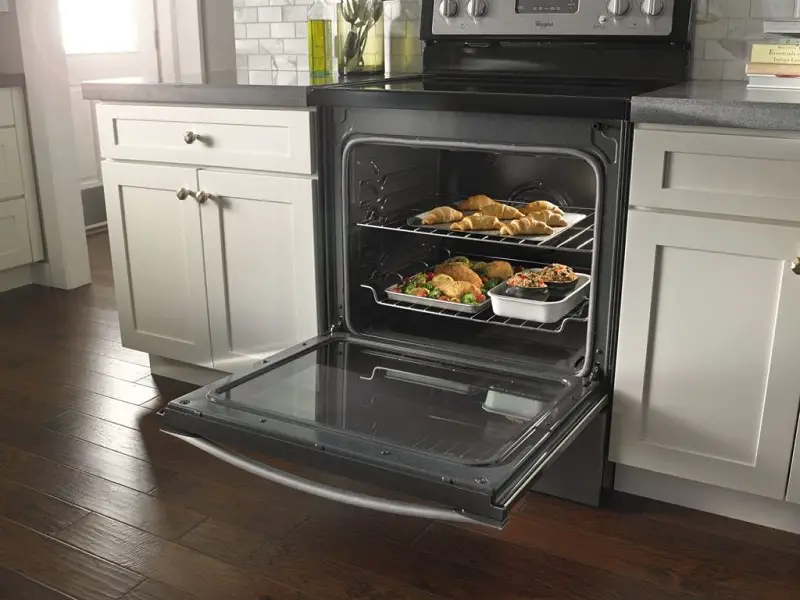
Table of Contents
Whirlpool Oven Not Heating After Self Cleaning — How To Fix
If your Whirlpool oven is not heating after self clean or after a power outage, the thermal fuse is faulty. Follow these steps to replace the thermal fuse of your Whirlpool oven…
Step 1: Turn the oven around to access the rear and disconnect the power cord for safety.
Step 2: Use a Philips head screwdriver to take out the screws which hold the two back panels in place.
Step 3: Lift the back panels off and set them aside.
Step 4: Disconnect the wires from the terminals of the thermal fuse. You should see the thermal fuse somewhere close to the terminals of the bake or broil element.
Step 5: Remove the thermal fuse by taking out the screw or screws which hold it in place.
Step 6: Get a new thermal fuse and secure it to the oven with the screw or screws.
Step 7: Return the oven’s back panels and secure them with the screws.
Step 8: Reconnect the oven’s power cord.
The video below will give you a visual of how to replace your Whirlpool oven thermal fuse.
Whirlpool Oven Heating Element Not Working — How To Fix
If your Whirlpool oven heating element is not working, there is more than one possible reason. The element itself could be faulty, the wires connected to it may be damaged, or the control board could be faulty. In this article: Whirlpool Oven Element [How To, Issues & Solutions] we talk about all these things and show you what to do about them. Also read the article in the link to replace your bake element if your Whirlpool oven is not heating but the broiler works, if your Whirlpool electric oven is heating up slowly, or your Whirlpool oven is not heating on bake.
Whirlpool Oven Not Heating — How To Fix
Below, we talk about the possible reasons why your Whirlpool gas oven won’t heat and why your Whirlpool electric oven won’t heat.
Whirlpool Electric Oven Not Heating — How To Fix
Below, we have listed the possible causes of this problem and what to do about them.
1. Bake Element
A bake element is used in a Whirlpool oven. If the element fails, the oven won’t heat. To determine if the bake element is faulty, you will need to test it with a multimeter. If the bake element is faulty, you should replace it. Read the article “Whirlpool Oven Heating Element Not Working” section above to replace your Whirlpool oven heating element.
2. Burnt Wire
If the bake element isn’t faulty, the next thing you should check is that the wires connected to it are in good shape. Make sure the wires are properly connected to the bake element. Also check the wires for any damage. If the wires appear burnt or damaged in any way, contact a qualified technician to fix them.
3. Control Board
The control board is one of the main components in an oven. If the control board fails, the bake element won’t receive the voltage it needs to operate. Before you replace the control board, make sure to check the other two things above. If they are in good shape, read this article: Whirlpool Oven Control [Problems & Proven Solutions] to replace your control board.
Whirlpool Gas Oven Not Heating — How To Fix
Below, we have listed the possible reasons why your Whirlpool gas oven won’t heat and what to do about them.
1. Igniter
An igniter is used in most Whirlpool gas ovens to ignite the gas sent from the safety valve. If the igniter fails, the oven won’t heat. Follow these steps to replace the igniter of your Whirlpool oven…
Step 1: Unplug the oven’s power cord for safety and shut off the gas supply.
Step 2: Using a Philips head screwdriver, take out the screws which hold the igniter wire cover on the lower rear of the oven. The cover is on the right.
Step 3: Disconnect the wire plug from the igniter and open the oven door.
Step 4: Remove the racks from the oven and lift the bottom panel out.
Step 5: Using a 5/16th inch socket or nut driver, take out the two screws which secure the igniter to the left side of the burner tube.
Step 6: Pull out the igniter and get a new one.
Step 7: Position the igniter in the oven and secure it with the two screws.
Step 8: Reposition the oven’s bottom panel and slide the racks back in.
Step 9: Shut the oven door and go to the oven’s rear.
Step 10: Connect the wire plug to the igniter wire plug and reposition the access cover.
Step 11: Hold the access cover in place with the screws.
Step 12: Plug the oven back in.
Step 13: Turn the oven’s gas supply back on.
Follow the steps above to replace your igniter if your Whirlpool gas oven is heating up slowly.
The video below will show you how to replace a Whirlpool oven igniter.
2. Spark Electrode
If your Whirlpool oven doesn’t have an igniter, the spark electrode is the first component you should replace if the oven stops heating. Below, we have listed the steps you need to follow in order to replace the spark electrode in your Whirlpool gas oven…
Step 1: Pull the oven away from the wall.
Step 2: Unplug the oven’s power cord from the outlet.
Step 3: Shut off the oven’s gas supply.
Step 4: Open the oven door and slide out the racks.
Step 5: Take out the two Philips head screws which hold the oven’s bottom panel in place.
Step 6: Lift the panel out of the oven and set it aside.
Step 7: Use the Philips head screwdriver to take out the screws at the front and back of the burner tube which hold it in place.
Step 8: Lift the burner tube and disconnect the wire from the spark electrode. Make sure the wire doesn’t fall through the oven’s bottom panel.
Step 9: Take out the two screws which hold the electrode to the burner tube.
Step 10: Get a new electrode and secure it to the burner tube with the screws.
Step 11: Take the burner tube back to the oven and connect the wire to the electrode.
Step 12: Secure the burner tube to the oven with the screws.
Step 13: Reposition the oven’s bottom panel and hold it in place with the two Philips head screws.
Step 14: Slide the racks back into the oven.
Step 15: Shut the oven door.
Step 16: Plug the oven’s power cord back in.
Step 17: Turn the oven’s gas supply back on.
Step 18: Return the oven to its usual position.
Watch the video below for a visual of how to replace the electrode in a Whirlpool oven.
3. Safety Valve
If your igniter or spark electrode isn’t faulty, the next component you should check is the safety valve. Follow these steps to replace your Whirlpool oven safety valve…
Step 1: Unplug the oven’s power cord. You will need to pull the oven away from the wall to do this.
Step 2: Shut off the gas supply and open the oven door.
Step 3: Remove the racks and set them aside.
Step 4: Lift the oven’s bottom panel out.
Step 5: Take out the two Philips head screws which hold the burner tube in place. There is one at the front and one at the back.
Step 6: Lift the burner tube and move it to the side.
Step 7: Go to the oven’s rear and take out the screws which hold the access cover on the right.
Step 8: Set the cover aside and disconnect the wires from the terminals of the safety valve.
Step 9: Test the safety valve using a multimeter. If there is no continuity, the safety valve should be replaced.
Step 10: Using an adjustable wrench and a 9/16th inch wrench, take out the nut which holds the gas tube to the safety valve.
Step 11: Take out the two screws which hold the safety valve in place.
Step 12: Remove the safety valve and get a new one.
Step 13: Secure the safety valve to the oven’s rear with the two screws.
Step 14: Secure the gas tube to the safety valve with the nut and reconnect the wires to the terminals.
Step 15: Reposition the access cover and hold it in place with the screws.
Step 16: Go to the oven interior and secure the burner tube with the two screws.
Step 17: Reposition the oven’s bottom panel.
Step 18: Slide the racks back into the oven and shut the door.
Step 19: Plug the oven’s power cord back in.
Step 20: Turn on the oven’s gas supply and return the oven to its usual position.
The video below will give you a visual of how to replace the safety valve in a Whirlpool oven.
4. Loose Or Burnt Wire Connection
If your igniter, electrode, and spark electrode aren’t faulty, the wires connected to them may be. Make sure the wires connected to each of these components are tightly connected. Also inspect the wires for any damage. If the wires appear burnt or damaged in any way, contact a qualified technician to fix them.
5. Control Board
The control board is the final possible reason your Whirlpool gas oven will not heat. If you have checked all the things above and none of them is faulty, the control board probably is. If the control board fails, the components in the oven won’t receive the voltage they need to operate. Read the “Whirlpool Electric Oven Not Heating” section above to replace the control board in your Whirlpool oven.
Check out these articles…
Whirlpool Oven Error Codes [How To Fix]
Whirlpool Stove Knobs [Problems & Proven Solutions]
Whirlpool Oven Fuse [How To, Problems & Solutions]
How To Calibrate A Whirlpool Oven [Detailed Guide]
Whirlpool Oven Thermostat [How To, Guide]
How To Test Whirlpool Oven Heating Element
Below, we show you how to test a Whirlpool oven heating element…
Step 1: Get a multimeter.
Step 2: Turn the multimeter dial to the lowest ohms setting.
Step 3: Touch the two multimeter probes to the terminals of the heating element.
Step 4: Look at the multimeter display. It should read anywhere from 30 to 100 ohms. If the display of the multimeter doesn’t change, the heating element is faulty.
Watch the video below for a visual of how to test a Whirlpool oven heating element.
Whirlpool Oven Not Heating Past 100 — How To Fix
If your Whirlpool oven is not heating past 100, the temperature sensor is faulty. The sensor monitors the oven temperature to tell the heating elements when to turn on and off. If the sensor fails, it will send a false signal. Read this article: Whirlpool Oven Temperature [Problems & Proven Solutions] to replace the temperature sensor in your Whirlpool oven.
Whirlpool Oven Uneven Heating — How To Fix
Below, we have listed the possible reasons your Whirlpool oven is heating unevenly and what to do about them.
1. Broil Element
During bake, the oven uses both the bake and broil elements to heat the oven. This is to ensure that your food cooks evenly. So, if the broil element fails, your food won’t cook evenly. Read this article: Whirlpool Oven Broil [How To, Issues & Proven Solutions] if you would like to replace the broil element in your Whirlpool oven.
2. Rack Uneven
If the rack isn’t properly placed in the oven, it could cause your food to cook unevenly. Inspect the oven racks. Make sure that the two sides are on the same level. If they aren’t reposition them and test the oven again. If that doesn’t fix the problem, keep reading.
3. Uneven Oven
If the legs of the oven aren’t on the same level, it could cause uneven cooking. Pull the oven out and look at all the legs. If one or more of the legs appear shorter or longer than the others, they should be adjusted. Adjust the legs of the oven using a wrench. As you are adjusting, make sure the top of the oven is leveled with the countertop.
4. Fan
If your oven is a fan assisted oven, you need to check that it still works. The fan in the oven helps you get even food. So, if the fan stops working, it could result in uneven food. The fan motor should be replaced if the oven fan has stopped working. Read this article: Whirlpool Oven Fan Problems [How To Fix] to replace the convection fan motor in your Whirlpool oven.
Whirlpool Oven Overheating — How To Fix
Below, we list the possible causes of this problem and and how to fix them.
1. Temperature Sensor
The temperature sensor monitors the oven’s temperature to make sure it doesn’t exceed or go lower than the set temperature. If the temperature sensor fails, it could cause the oven to overheat. To determine if the sensor is actually faulty, you will need to test it with a multimeter. Read the “Whirlpool Oven Not Heating Past 100” section above to test and replace the temperature sensor in your Whirlpool oven.
2. Heating Element
If the heating element shorts out, the oven will overheat. To determine if this is the case, do the following…
Step 1: Pull the oven away from the wall and unplug the power cord from the outlet.
Step 2: Using a Philips head screwdriver, take out the screws which hold the oven’s lower back panel in place.
Step 3: Set the panel aside.
Step 4: Get a multimeter and turn the dial to the ohms setting.
Step 5: First, we will test the broil element. Disconnect the wires from the terminals of the broil element.
Step 6: Touch one multimeter probe to one of the broil element terminals. The multimeter should not show any reading. If the multimeter shows a reading, the broil element has shorted out.
Step 7: Lift the multimeter probe of the terminal and place it on the other broil element terminal.
Step 8: If the broil element isn’t faulty, reconnect the wires and move on to test the bake element.
Read the “Whirlpool Oven Heating Element Not Working” section above to replace the bake or broil element of your Whirlpool oven.
3. Control Board
If one of the relays on the control board for the bake or broil element shorts out, it will cause the elements to receive continuous voltage. This will cause the oven to overheat. If you have checked the sensor and heating elements but they aren’t faulty, read the “Whirlpool Electric Oven Not Heating” section above to replace your control board.
4. Cooling Fan
The cooling fan turns on to prevent the oven from overheating. If the cooling fan fails, the oven will overheat. Note that replacing a Whirlpool oven cooling fan is complicated and should not be done if you aren’t a bit experienced with ovens. Read this article: Whirlpool Oven Fan Problems [How To Fix] to replace the cooling fan in your Whirlpool oven.
Whirlpool Stove Overheating — How To Fix
If your Whirlpool electric stove top is overheating, the infinite switch should be replaced. If the infinite switch switch fails, the stove top will either overheat or stop working. Read this article: Whirlpool Oven Element [How To, Issues & Solutions] to replace the infinite switch of your Whirlpool stove.
Whirlpool Stove Top Not Working — How To Fix
Below, we talk about the possible reasons why your Whirlpool electric stove top and gas stove top won’t work.
1. Radiant Element
If your Whirlpool stove is electric and it has a glass stove top, it uses a radiant element. If the radiant element fails, the stove top won’t heat. Read the linked article in the section “Whirlpool Stove Overheating” directly above this one to replace your Whirlpool stove top radiant element.
2. Infinite Switch
If the radiant element is not faulty, the next thing you should check is the infinite switch. When you turn the stove top control knob on, the infinite sends voltage to the radiant element to heat. If the infinite switch fails, the stove top won’t heat. Read the “Whirlpool Stove Overheating” section above to replace the infinite switch.
3. Burnt Or Loose Wires
If the radiant element and infinite switch aren’t faulty, you should make sure the wires connected to them are tight. If the wires are tight, inspect them for any damage. If the wires appear burnt or damaged in any way, contact a qualified technician to fix them.
4. Element Coil
If your oven uses an element coil and not a radiant element, you should replace it first if your Whirlpool stove top stops heating. Below, we show you how to replace a Whirlpool stove top element coil…
Step 1: Unplug the oven’s power cord for safety.
Step 2: Lift the faulty element coil.
Step 3: Pull the terminals of the element coil from the receptacle.
Step 4: Get a new element coil.
Step 5: Insert the terminals of the element coil into the receptacle.
Step 6: Position the clip of the element into notch in the drip pan.
Step 7: Plug the oven’s power cord back in.
Watch the video below for a visual of how to replace a Whirlpool stove top element coil.
5. Receptacle
Follow the steps below to replace your Whirlpool stove top receptacle…
Step 1: Pull the oven away from the wall.
Step 2: Unplug the oven’s power cord from the outlet or switch the circuit breaker off to avoid the risk of electrocution.
Step 3: Lift the element with the faulty receptacle.
Step 4: Pull the terminals of the element off the receptacle and remove the drip pan.
Step 5: Take out the screw which holds the receptacle to the stove top. Do this with a Philips head screwdriver.
Step 6: Lift the stove top.
Step 7: Get a pair of pliers.
Step 8: Snip the receptacle wires four inches away from the receptacle itself.
Step 9: Get a new receptacle kit.
Step 10: Strip off 1/4 inch of the wires you cut from the receptacle with the pair of pliers.
Step 11: Take the heat shrink tubes from the kit and slide it over the two wires of the stove top.
Step 12: Get the terminal block from the kit.
Step 13: Match the wires connected to the terminal block to the wires in the oven.
Step 14: Secure them with ceramic wire nuts. Do not use plastic wire nuts.
Step 15: Slide the heat shrink tubes over the wire nuts.
Step 16: Shrink the tubes over the nuts using a heat gun. Be careful not to burn the tubes as you do this.
Step 17: Choose a mounting bracket from the kit. Make sure the one you choose is as similar to the old one as possible.
Step 18: Slide the mounting bracket unto the terminal block.
Step 19: Position the receptacle on the stove top and hold it in place with the Philips head screw.
Step 20: Lower the stove top.
Step 21: Place the drip pan back on the stove top.
Step 22: Insert the terminals of the element coil into the receptacle.
Step 23: Lower the element and position the tab in the slot.
Step 24: Plug the oven back in or switch the circuit breaker back on.
Step 25: Return the oven to its usual position.
The video below will show you how to replace your Whirlpool stove top element coil receptacle.
6. Igniter
If your Whirlpool gas stove top won’t work, the igniter is probably faulty. If you have made sure that you haven’t exhausted your gas supply but the stove top won’t turn on, you should try replacing the igniter. Below, we have listed the steps you need to follow in order to replace your Whirlpool stove top igniter…
Step 1: Pull the oven away from the wall.
Step 2: To avoid the risk of electrocution, unplug the oven’s power cord from the outlet.
Step 3: Shut off the oven’s gas supply as well.
Step 4: Lift the burner grates off and set them aside.
Step 5: Also lift off the cap of the faulty burner.
Step 6: Using a Philips head screwdriver, take out the screws which hold the burner base to the stove top.
Step 7: Lift the burner base.
Step 8: Disconnect the wire from the igniter on the burner base. Make sure the wire doesn’t fall through the stove top.
Step 9: Take out the Philips head screw which holds the igniter to the burner base.
Step 10: Get a new igniter.
Step 11: Position the new igniter on the burner base and secure it with the Philips head screw.
Step 12: Take the burner base back to the stove top and connect the wire to the igniter.
Step 13: Position the burner base on the stove top and hold it in place with the two Philips head screws.
Step 14: Place the cap back on the base.
Step 15: Return the burner grates.
Step 16: Turn the oven’s gas supply back on.
Step 17: Plug the oven’s power cord back in.
Step 18: Return the oven to its usual position.
The video below will give you a visual of how to replace your Whirlpool stove top igniter.
7. Spark Switch Wire Harness
If more than one burner on your Whirlpool gas stove top won’t work, you should replace the spark switch wire harness. Below, we have listed the steps you need to follow in order to replace your Whirlpool spark switch wire harness…
Step 1: Pull the oven away from the wall.
Step 2: Unplug the oven’s power cord from the outlet.
Step 3: Shut off the oven’s gas supply.
Step 4: Lift off the burner grates and caps.
Step 5: Using a Philips head screwdriver take out the two screws which hold the burner bases to the stove top.
Step 6: Lift the burner bases and disconnect the wires from them.
Step 7: Take out the screws which hold the orifice holders to the stove top.
Step 8: Open the oven door.
Step 9: Pull off the oven control knobs. Make sure to note where each one goes.
Step 10: Take out the screws underneath the front panel which secure it.
Step 11: Lift the panel off and set it aside.
Step 12: Take out the screws under the stove top which hold it in place.
Step 13: Lift the stove top and take out the screw which holds the spark module bracket to the right side.
Step 14: Set the stove top aside.
Step 15: Using the Philips head screwdriver, take out the screws which hold the upper and lower back panels of the oven in place.
Step 16: Detach the wire retainer on the upper left of the oven’s rear and disconnect the wire plug of the spark switch wire.
Step 17: Disconnect the white and red wires connected to the spark module.
Step 18: Cut the zip ties which hold the spark switch wires to the front manifold. You can do this with a pair of pliers.
Step 19: Pull each spark switch off the valves.
Step 20: Remove the spark switch wire harness and get a new one.
Step 21: Push the spark switches onto the valve stems.
Step 22: Connect the red and white spark wires to the spark module.
Step 23: Secure the wires to the manifold with zip ties.
Step 24: Pass the wires through the oven’s rear and reconnect the wire plug.
Step 25: Secure the wires in the retainer.
Step 26: Reposition the upper and lower back panels and secure them with the Philips head screws.
Step 27: Reposition the stove top and screw the spark module bracket to it.
Step 28: Secure the stove top with the screws. Make sure the orifice holders are accessible through the holes in the stove top.
Step 29: Reposition the front panel and hold it in place with the screws.
Step 30: Push the control knobs back onto the right places and shut the oven door.
Step 31: Screw the orifice holders back to the stove top.
Step 32: Connect the wires to the burner bases.
Step 33: Secure the burner bases with the screws.
Step 34: Place the caps back onto the bases.
Step 35: Return the burner grates.
Step 36: Turn the oven’s gas supply back on.
Step 37: Plug the oven’s power cord back in.
Step 38: Return the oven to its usual position.
Watch the video below for a visual of how to replace a Whirlpool stove top spark switch wire harness.
8. Spark Module
If your Whirlpool gas stove top won’t work still, the next thing you should replace is the spark module. Follow these steps to replace your Whirlpool stove top spark module…
Step 1: Pull the oven away from the wall.
Step 2: Unplug the oven’s power cord from the outlet.
Step 3: Shut off the oven’s gas supply.
Step 4: Lift the burner grates off and set aside.
Step 5: Lift off all the burner caps and the center burner assembly.
Step 6: Using a Philips head screwdriver, take out the screws which hold the burner bases to the stove top.
Step 7: Lift the burner bases and disconnect the wires from them. Make sure the wires don’t fall through the holes.
Step 8: Take out the screws which hold the orifice holders to the stove top.
Step 9: Open the oven door and take out the screws underneath the front panel which secure it.
Step 10: Pull off the control knobs. Make sure to note where each one goes.
Step 11: Lift the front panel off and set it aside.
Step 12: Take out the two screws underneath the stove top which secure it.
Step 13: Lift the stove top.
Step 14: Take out the screw which holds the spark module mounting bracket to the right side of the stove top.
Step 15: Note where each wires goes on the spark module by taking a picture.
Step 16: Disconnect the wires from the spark module.
Step 17: Unscrew the spark module from the mounting bracket.
Step 18: Get a new spark module.
Step 19: Screw the new spark module to the bracket and reconnect the wires. Make sure each wire goes to the right place.
Step 20: Screw the spark module mounting bracket to the stove top.
Step 21: Lower the stove top and secure it with the two screws.
Step 22: Reposition the oven’s front panel and hold it in place with the screws.
Step 23: Push the control knobs back onto the right places.
Step 24: Shut the oven door.
Step 25: Secure the orifice holders to the stove top with the screws.
Step 26: Reconnect the wires to the burner bases.
Step 27: Secure the burner bases to the stove top with the screws.
Step 28: Return the center base assembly.
Step 29: Place the caps back on the burner bases.
Step 30: Also return the grates.
Step 31: Turn the oven’s gas supply back on.
Step 32: Plug the oven back in and return it to its usual position.
Watch the video below for a visual of how to replace a Whirlpool stove top spark module.
9. Spark Module Board
The spark module board sends voltage to the spark module to operate. If it fails, the spark module won’t send a signal to the igniter to light the burner. If you have tried everything above but they don’t fix the problem, the spark module board is probably faulty. Follow these steps to replace the spark module board of your Whirlpool stove…
Step 1: Pull the oven away from the wall.
Step 2: Unplug the oven’s power cord from the outlet.
Step 3: Take out the screws which hold the upper and lower back panels of the oven in place.
Step 4: Set the panels aside.
Step 5: Note where each wire goes on the spark module board then disconnect them. The board is on the right.
Step 6: Take out the screw which holds the board in place.
Step 7: Get a new spark module board.
Step 8: Screw the board to the oven and reconnect the screws. Make sure that the wires go to the right places.
Step 9: Reposition the oven’s upper and lower back panels.
Step 10: Secure the panels with the screws.
Step 11: Plug the oven’s power cord back in.
Step 12: Return the oven to its usual position.
Watch the video below for a visual of how to replace a Whirlpool stove spark module board.