If your Maytag oven won’t turn off, this article is for you. We will show you how to fix this problem and a few other problems related to this.
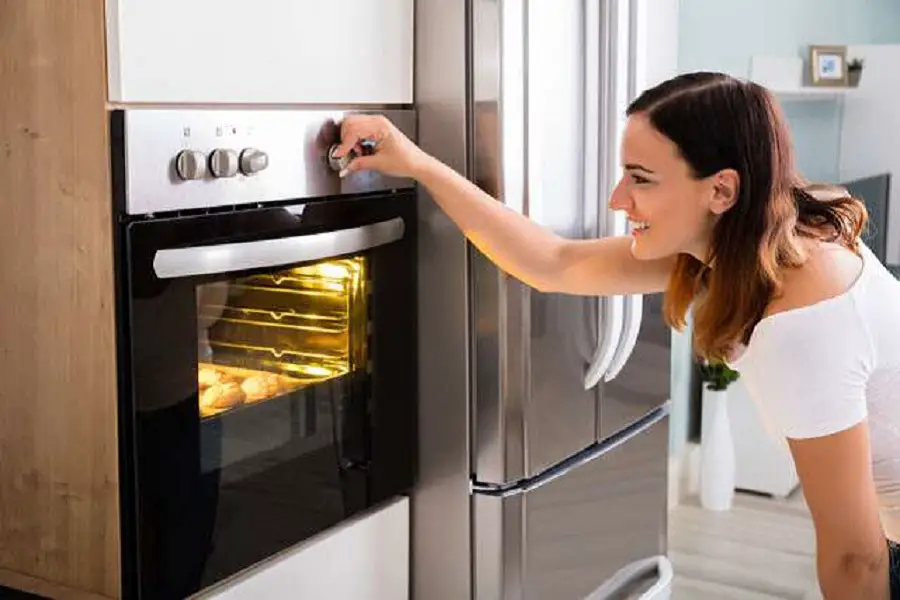
Maytag Oven Won’t Turn Off — How To Fix
Below, we have listed the possible reasons why your Maytag oven won’t turn off and what to do about them.
1. Bake Element
If the bake element shorts out while in use, it could cause the oven to stay on continually. To determine if the bake element is actually at fault, it will need to be tested with a multimeter. If the bake element is faulty, it should be replaced. In the article “Maytag Oven Element [Problems & Solutions]” we show you how to replace the bake element in a Maytag oven.
2. Broil Element
Similar to the bake element, if the broil element shorts out, the your Maytag oven won’t turn off. Below, we show you how to test and replace the broil element in a Maytag oven…
Step 1: Unplug the oven’s power cord or switch the circuit breaker off.
Step 2: Open the oven door and remove the racks.
Step 3: There is a lock on each door hinge, flip them towards yourself.
Step 4: Close the door till it stops then lift it off.
Step 5: Set the door on a cloth lined surface.
Step 6: Using a Philips head screwdriver, take out the screws on the top wall of the oven which hold the broil element in place.
Step 7: Take out the other screws on the back wall which hold the broil element.
Step 8: Disconnect the wires from the terminals of the broil element. Make sure the wires don’t fall through the holes.
Step 9: Slide off the mounting bracket from the broil element.
Step 10: Get a multimeter and turn the dial to the ohms setting.
Step 11: Touch the multimeter probes to the terminals of the broil element. If there is no continuity, the broil element should be replaced.
Step 12: Get a new broil element and slide the mounting bracket on it.
Step 13: Connect the wires to the broil element.
Step 14: Secure the broil element with the two screws at the rear and the other two at the top.
Step 15: Return the racks to the oven.
Step 16: Lift the oven door and position the hinges back into the slots in the oven frame.
Step 17: Fully open the door and flip back the hinge locks.
Step 18: Close the oven door.
Step 19: Plug the oven back in or switch the circuit breaker on.
Watch the video below for a visual of how to replace the broil element in a Maytag oven.
3. Temperature Sensor
The temperature sensor monitors the oven’s temperature. If the sensor fails, it could send the wrong reading and cause the oven to keep heating. Read the article “How To Calibrate A Maytag Oven [Quick Guide]” to replace the temperature sensor in a Maytag oven and learn about a few other oven problems.
4. Control Board
This is the final possible reason why your Maytag oven won’t turn off. If you have tested all the components above and none of them is faulty, you should replace the control board. Read the article “Maytag Oven Control [Problems & Solutions]” if you would like to replace the control board in your Maytag oven yourself.
Maytag Oven Light Won’t Turn Off — How To Fix
Below are the possible reasons why your Maytag oven light won’t turn off and how to fix them.
1. Open Door
If your oven door doesn’t close properly, it will not come in contact with the door light switch to turn the light off. Try closing the door. If the door closes completely but the light in your Maytag oven won’t turn off still, keep reading. If the door doesn’t close properly, read the article “Maytag Oven Door [How To, Problems & Solutions]” to know why and how to fix it.
2. Light Switch
If the light switch fails, the light in your Maytag oven won’t turn off. Maytag ovens use two different types of light switches. One is called the door light switch and it is located on the side of the oven’s rear. The other one is a normal light switch located on the oven’s control panel. First we will show you how to replace the light switch located on the control panel. To replace the light switch located on the control panel, do the following…
Step 1: Switch off the oven’s circuit breaker off.
Step 2: Take out the screws at the top of the oven which hold the upper trim in place.
Step 3: Set the upper trim aside.
Step 4: Carefully pull the control panel towards yourself.
Step 5: Slide off the indicator light from the control panel.
Step 6: Disconnect the wires from the light switch.
Step 7: Squeeze the tabs on the light switch and push it out.
Step 8: Get a new light switch and push it into the control panel.
Step 9: Connect the wires to the light switch.
Step 10: Reposition the indicator light.
Step 11: Position the control panel on the oven and return the trim at the top.
Step 12: Hold the trim in place with the screws.
Step 13: Switch the oven’s circuit breaker back on.
The video below will give you a visual of how to replace the light switch of a Maytag oven.
Follow these steps to replace your door light switch if the light of your Maytag oven won’t turn off…
Step 1: Pull the oven away from the wall and unplug the power cord for safety.
Step 2: Using a Philips head screwdriver, take out the screws which hold the oven’s upper back panel in place.
Step 3: Go to the oven’s front and lift off the stove top. If there are screws under the stove top which hold it in place, take them out.
Step 4: Take out the screws which hold the metal panel cover on the top of the oven.
Step 5: Lift the panel up.
Step 6: Bend the small iron rod on the right side of the oven’s top to remove it.
Step 7: Go to the oven’s rear and disconnect the wires from the door light switch.
Step 8: Test the switch using a multimeter. If there is no continuity, the switch should be replaced.
Step 9: Squeeze the tabs on the light switch to push it out.
Step 10: Unhook the rod from the light switch and hook it on the new one.
Step 11: Push the new light switch into place.
Step 12: Reconnect the wires to the door light switch.
Step 13: Push the rod back into the hole at the front of the oven.
Step 14: Reposition the oven’s upper back panel.
Step 15: Hold the back panel in place with the screws.
Step 16: Lower the top metal panel cover and hold it in place with the screws.
Step 17: Lower the stove top.
Step 18: If you took out any screws underneath the stove top, return them.
Step 19: Plug the oven’s power cord back into the outlet.
The video below will give you a visual of how to replace the door light switch in a Maytag oven.
Check out these articles…
Kitchenaid Oven Is Not Working [How To Fix]
How To Clean A Maytag Oven… [Detailed Guide]
Maytag Oven Door [How To, Problems & Solutions]
Maytag Oven Will Not Turn On [& Related Issues Solved]
Maytag Oven Turns Off By Itself [& Related Issues Solved]
3. Touchpad
If the touchpad fails, the light in your Maytag oven won’t turn off when you press the oven light button. Below, we show you how to replace the touchpad of your Maytag oven…
Step 1: Pull the oven away from the wall and unplug the power cord from the outlet. You could also switch the circuit breaker off.
Step 2: Using a Philips head screwdriver, take out the screws which hold the upper back panel of the oven in place.
Step 3: Set the panel aside.
Step 4: Note where each wire goes on the control board then disconnect them.
Step 5: Take out the screws which hold the control board to the oven.
Step 6: Get a putty knife.
Step 7: Using the putty knife, carefully pry off the touchpad from the control board.
Step 8: Get a new touchpad and peel off the backing.
Step 9: Stick the touchpad onto the control board.
Step 10: Secure the control board to the oven with the screws.
Step 11: Connect the wires to the right places on the control board.
Step 12: Reposition the oven’s upper back panel and hold it in place with the screws.
Step 13: Plug the oven back in or switch the circuit breaker back on.
Step 14: Push the oven back to its normal position.
4. Control Board
The control board controls all the components in an oven. If the light relay on the control board fails, the oven light won’t work the way it’s supposed to. This might make the oven light stay on. If the light of your Maytag oven won’t turn off and you have checked all the other components above, the control board should be replaced. Read the article “Maytag Oven Control [Problems & Solutions]” to replace the control board in a Maytag oven.
Maytag Oven Fan Won’t Turn Off — How To Fix
Below, we have listed the possible reasons why the fan of your Maytag oven won’t turn off and what to do about it…
1. High Limit Thermostat
If the high limit thermostat fails, it could cause the fan in your Maytag oven not to turn off. Below, we show you how to test and replace a Maytag oven high limit thermostat…
Step 1: Pull the oven away from the wall and unplug the power cord.
Step 2: Using a Philips head screwdriver, take out the two screws which hold the support bracket of the oven’s upper back panel.
Step 3: Remove the support bracket and take out the screws which hold the oven’s lower back panel in place.
Step 4: Set the panel aside and disconnect the wires from the high limit thermostat.
Step 5: Get a multimeter.
Step 6: Test the high limit thermostat for continuity using the multimeter. If there is no continuity, the high limit thermostat will need to be replaced.
Step 7: Take out the screws which hold the high limit thermostat in place and get a new one.
Step 8: Screw the new high limit thermostat into place.
Step 9: Reconnect the wires.
Step 10: Reposition the oven’s back panel and hold it in place with the screws.
Step 11: Return the support bracket and the screws which hold it in place.
Step 12: Plug the oven back in and push it back to the wall.
The video below will show you how to replace the high limit thermostat in a Maytag oven.
2. Thermostat
If your oven doesn’t have a high limit thermostat or replacing the high limit thermostat didn’t fix the problem, the next component you should replace is the thermostat. Below, we show you how to replace the thermostat in a Maytag wall oven…
Step 1: Locate the oven’s circuit breaker and switch it off.
Step 2: Open the oven door.
Step 3: Using a Philips head screwdriver, take out the screws which hold the oven to the cabinet. There are screws on each side of the oven frame.
Step 4: Pull the oven out of the cabinet and set on a towel lined surface.
Step 5: Take out the screws at the top of the oven which hold the trim.
Step 6: Remove the trim.
Step 7: Pull off the oven control knobs and lift the control panel forward.
Step 8: Slide off the indicator light from the control panel.
Step 9: Disconnect the wires from the light switch on the control panel.
Step 10: Take out the screws which hold the control panel housing in place.
Step 11: Take out the screws which hold the selector switch and thermostat in place.
Step 12: Disconnect the wires from the panel housing and set it aside.
Step 13: Note where each wire goes on the thermostat then disconnect them using a pair of needle nose pliers.
Step 14: Go to the oven interior and lift the thermostat capillary tube off the mounting clips.
Step 15: Pass the thermostat out through the hole.
Step 16: If there is a retainer for the thermostat wire on the rear of the oven, take out the screw which holds it in place.
Step 17: Take out the screws which hold the oven’s top panel in place.
Step 18: Fully remove the thermostat and get a new one.
Step 19: Pass the thermostat capillary tube through the hole in the oven’s back panel.
Step 20: Return the screws which hold the oven’s top panel in place.
Step 21: If you removed the retainer of the thermostat wire, return it and hold in place with the screw.
Step 22: Position the capillary tube back on the clips on the oven’s back wall.
Step 23: Connect the wires to the right places on the thermostat.
Step 24: Reconnect the wires to the control panel housing.
Step 25: Position the selector switch and thermostat on the housing.
Step 26: Secure them with the screws.
Step 27: Return the screws which hold the housing in place.
Step 28: Reconnect the light switch wires and indicator light to the control panel.
Step 29: Position the control panel on the oven and return the top trim.
Step 30: Hold the top trim in place with the screws.
Step 31: Push the control knobs back in.
Step 32: Lift the oven up and push it into the cabinet.
Step 33: Secure the sides of the oven to the cabinet with the screws.
Step 34: Close the oven door and switch the circuit breaker back on.
The video below will give you a visual of how to replace the thermostat in a Maytag wall oven.
3. Control Board
If the fan of your Maytag oven won’t turn off after replacing the above components, the control board is most likely faulty. Read the article in the section “Maytag oven light won’t turn off” if you would like to replace the control board in your Maytag oven.
Maytag Stove Burner Won’t Turn Off — How To Fix
If your Maytag stove burner won’t tun off, the infinite switch is faulty. Below, we show you how to replace the infinite switch of your Maytag oven…
Step 1: Pull the oven away from the wall.
Step 2: Unplug the oven’s power cord from the outlet.
Step 3: Pull off the knob of the faulty burner.
Step 4: Take out the two screws you see which hold infinite switch in place.
Step 5: Go to the oven’s rear and take out the screws which hold the upper back panel in place.
Step 6: Lift the panel off and set it aside.
Step 7: Note where each wire goes on the infinite switch.
Step 8: Using a pair of needle nose pliers, disconnect the wires from the infinite switch.
Step 9: Get a new infinite switch and connect the wires to it.
Step 10: Position the infinite switch in the oven and hold it in place with the two screws.
Step 11: Reposition the oven’s upper back panel and hold it in place with the screws.
Step 12: Push the control knob back into place
Step 13: Plug the oven back in.
Step 14: Return the oven to its usual position.
Also follow the steps above to replace your infinite switch if your Maytag oven indicator light won’t turn off.
Watch the video below if you would like a visual of how to replace the infinite switch in a Maytag oven.